I’ve been super excited to continue this project! Although I’ve realized some mistakes along the way; it’s all part of the creative process, right?
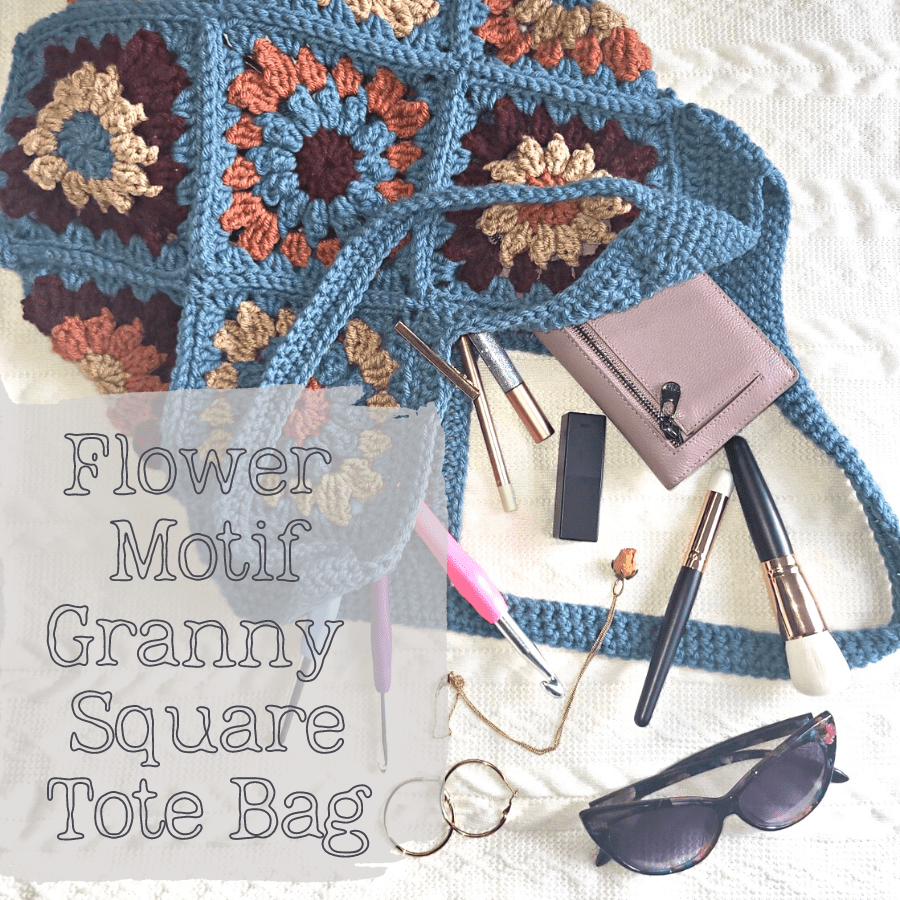
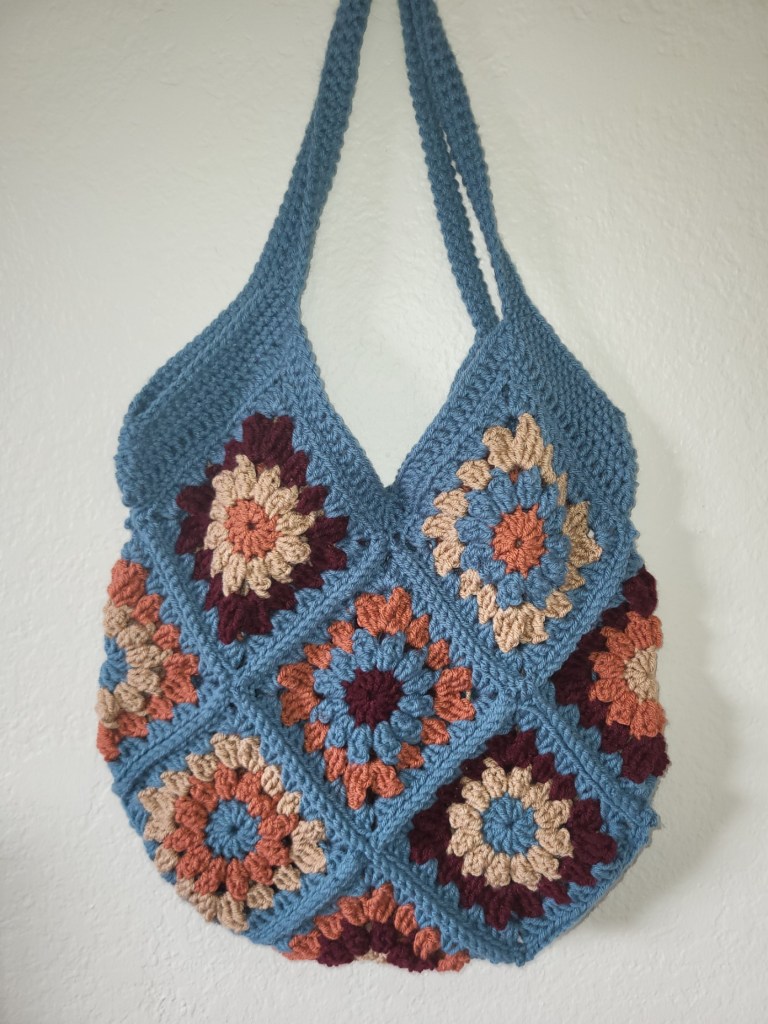
Honestly, I’ve always wanted to make a bag like this, and I’m super happy with the way it turned out. It was a bit more work than I anticipated, but I think it would be really good for an intermediate project! There are still so many more possibilities that could come from this bag, some thoughts would be a fabric lining, an option to reinforce the handle, and maybe even adding a cute closure to the center! The options are endless, and that’s the best part about crafting your own bags for me!
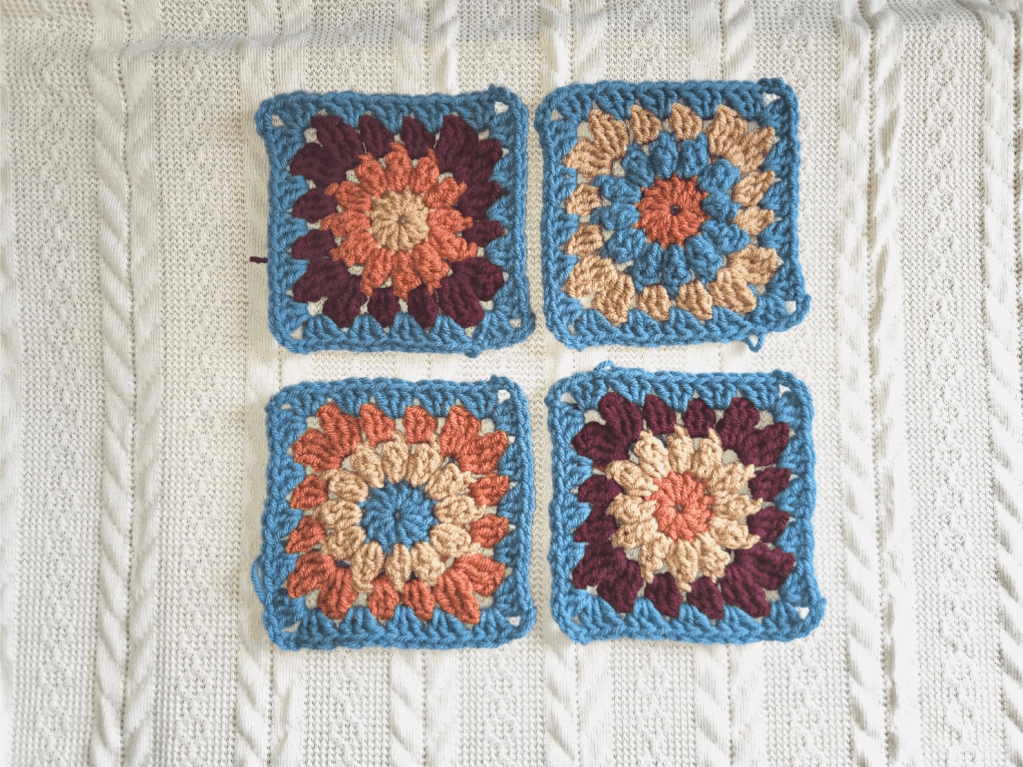
If you haven’t already seen my first post then refer back to that post for the Flower Motif Granny Square. Once there are 13 squares you’re all set to begin the toe bag pattern!
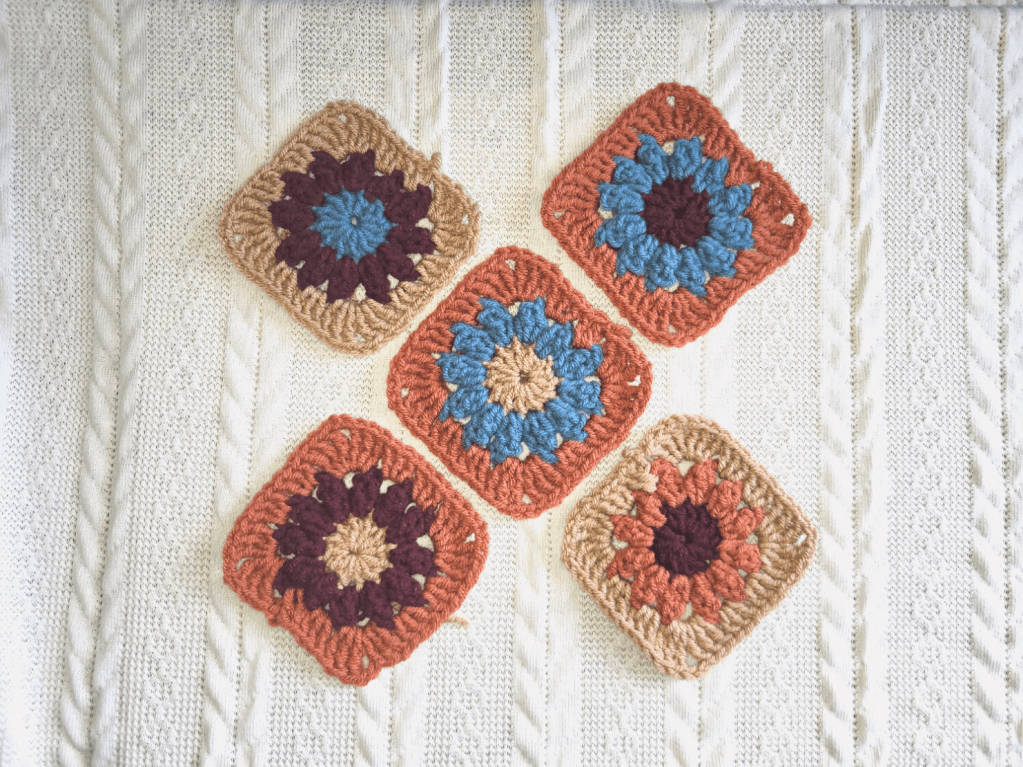
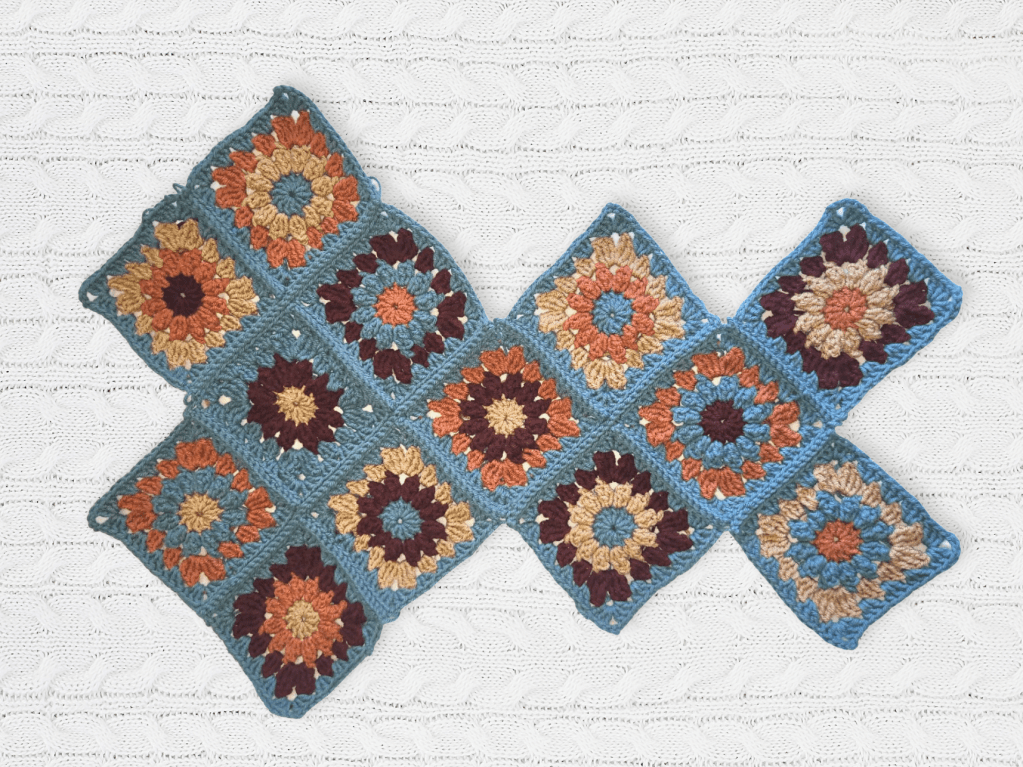
I realized I wanted a larger bag and some sort of more coherent color pattern, so I bordered each square in the blue yarn.
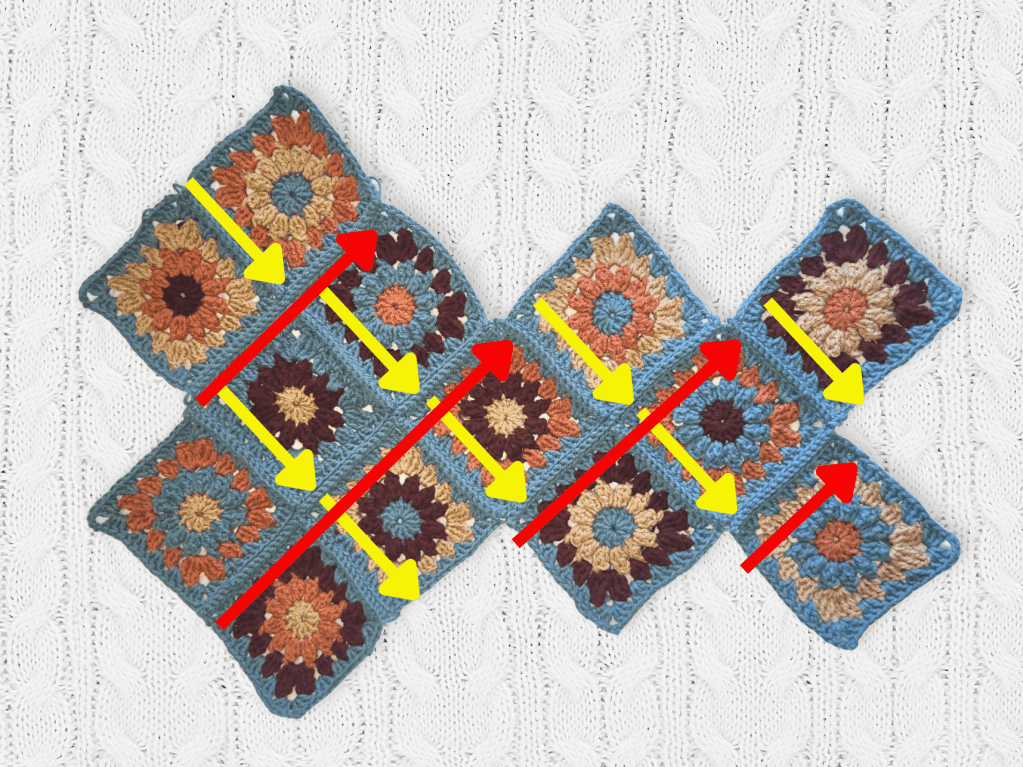
After that, it was time to piece it all together! Eagle eye viewers may notice that the layout is in fact different than the layout in my previous post. And I realized my mistake only after I had pieced it all together and attempted to fold it to make a bag. Conveniently, I didn’t take a picture of that mishap!
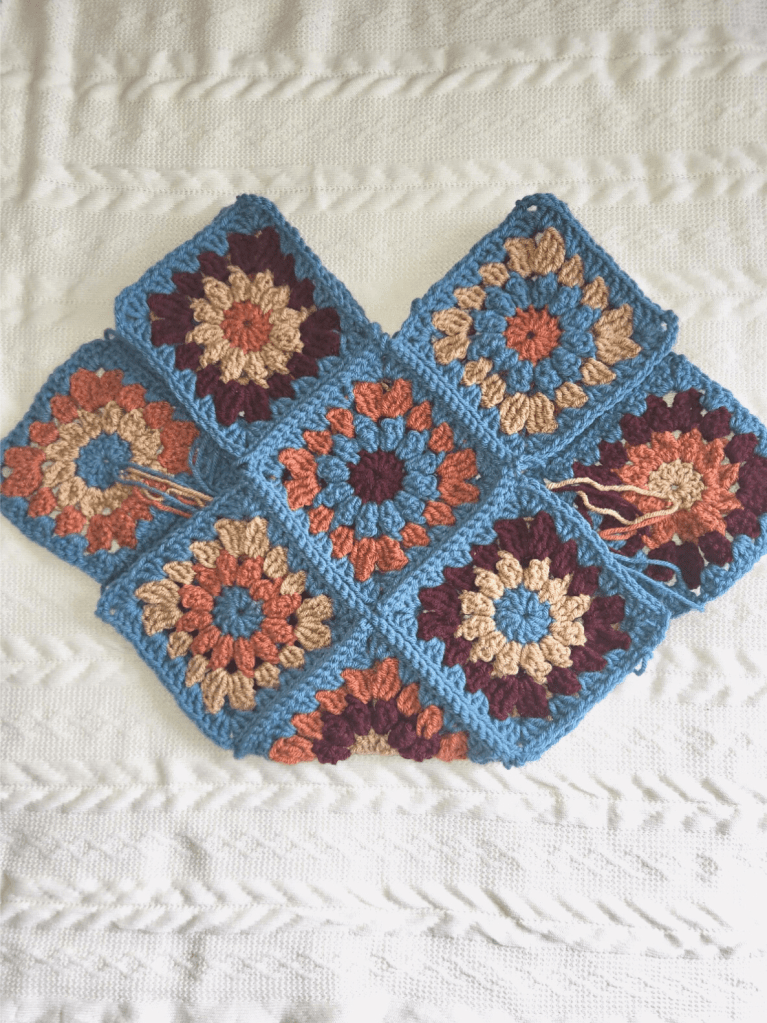
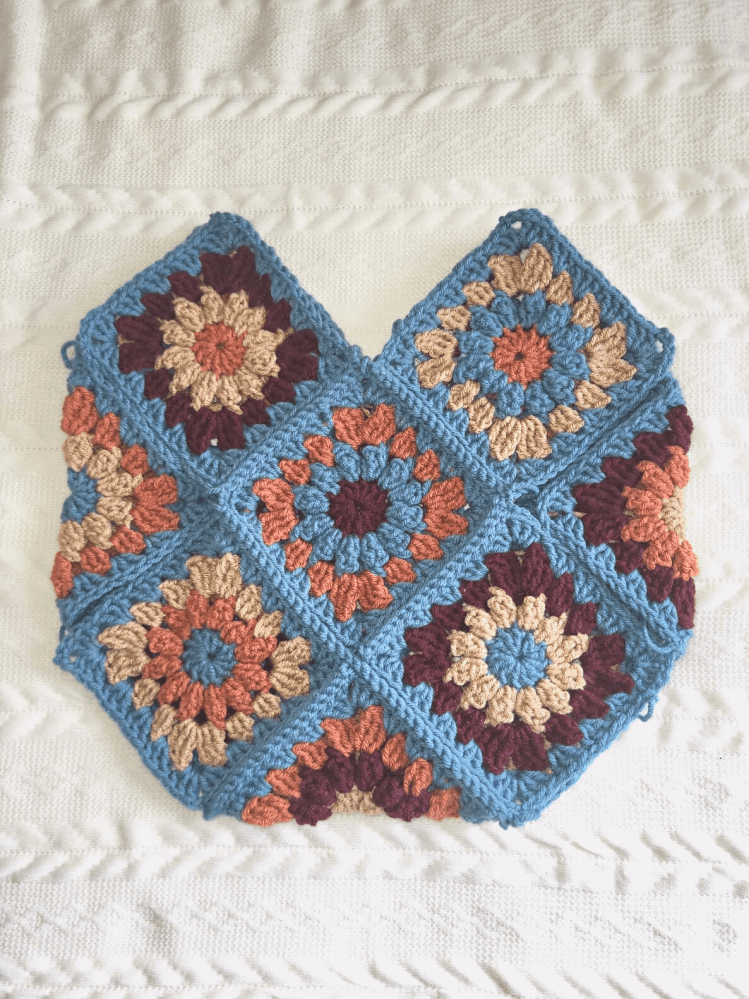
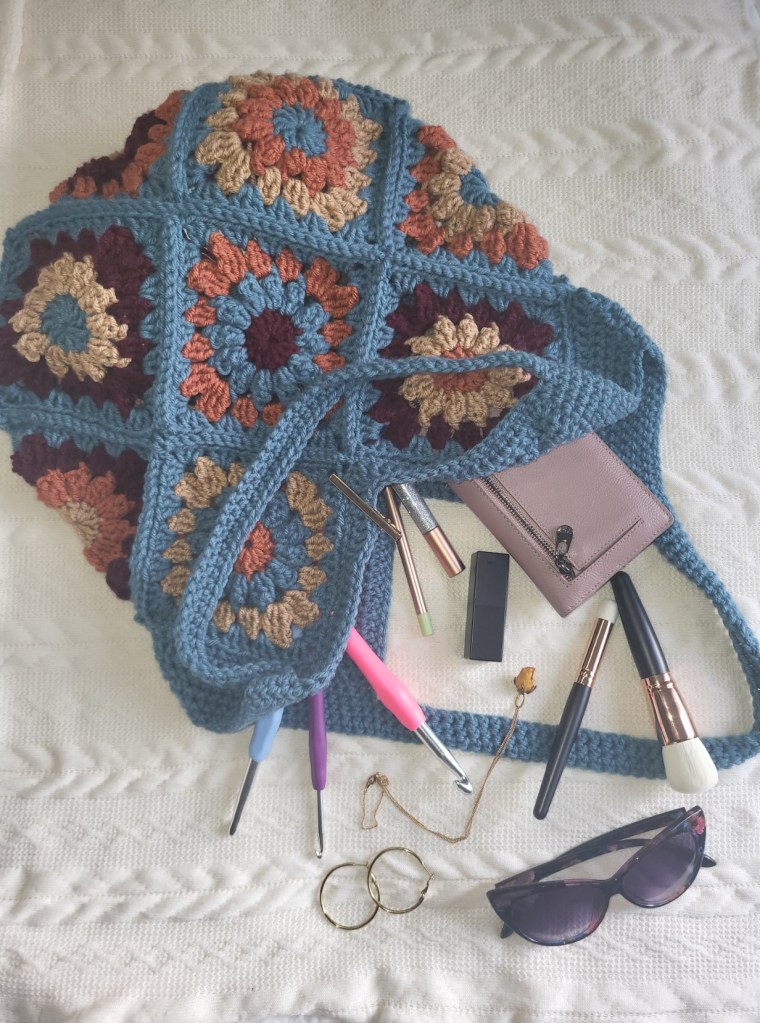
In order to make the bag shape, it must be folded on the center square, as shown below, and the two squares that stick out a bit can be folded over to make the cutest bag shape! You can also see that I hate weaving in ends… who doesn’t right? I literally won’t weave them in until the last second! In case a work in progress turns into an unfinished project that I’ve forgotten about!
Now, all that’s left is to add the handle! I also added another row of double crochet to the top, mostly just because I thought it looked nice. Adding the rest of the handle turned out to be a breeze.
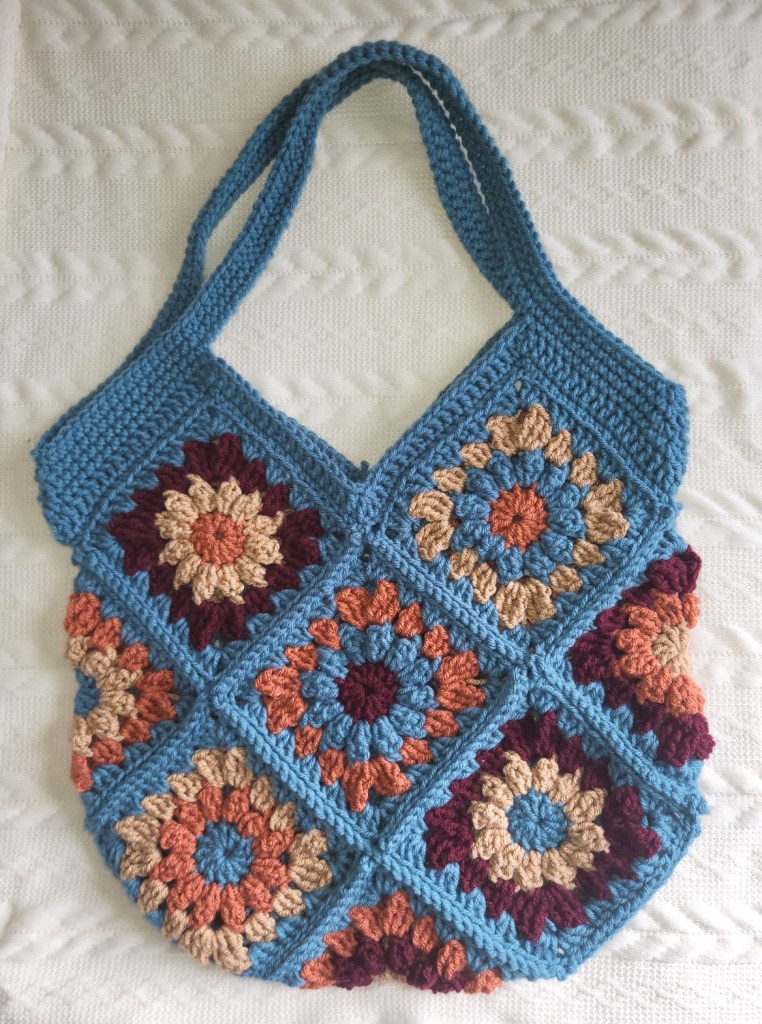
I think this bag would make a super cute fall-themed bag (even if we are approaching spring at this part) but fall is a state of mind, right? I think it would be super cute all year round!
Pattern:
Materials:
1 skein of worsted weight yarn
size I 5.5mm crochet hook
yarn scissors
tapestry needle
Legend:
ch – chain
sc – single crochet
dc – double crochet
blo – back loop only
sl st – slip stitch
rep – repeat
ch sp – chain space
sc3tog – single crochet 3 stitches together
dc3tog – double crochet 3 stitches together
Notes:
The border for the 13 granny squares and the handle are crocheted in the round.
Refer to the below guides for the assembly of the squares
Pattern:
Start with Flower Motif Granny Square from Part 1. Insert yarn into corner sp
Round 1: 3 dc in ch sp, [(3dc in next ch sp) rep 4x, ch 3, 3dc in same sp] 4x until first sp, ch3 and sl st to complete round, fasten off
Repeat with all squares
Assemble squares in the same fashion as the guide below.
Combing squares:
Join yarn to one corner of the square starting in the middle of the chain stitch. Join to the second square in the same chain, in blo on both sides, pull up a loop, and then sl through the second loop on the hook. Continue until all squares are combined.
Handle:
Round 1: Join yarn to side of bag 1sp from corner, ch 2, (15sc in blo, at outer corner, 3sc in sp, 15sc in blo, 1sc in inner corner sp) rep 4x until inner corn, sc in sp, sl st to join
Round 2: ch 3, 17dc, {3dc in next st, 17dc, dc3tog, 17dc} rep til last 3 stitches, dc3tog
Round 3: ch 2, sc 19sc, ch 55, connect ch to adjacent point, 19sc, sc3tog, 19 sc, ch 55, connect ch to adjacent point, 19, sc, join to fist stitch.
Round 4: ch 2, sc all stitches to opposite corner, sc 3 tog, sc to beginning
Round 5-6, or desired handle width: Repeat Round 4.

One thought on “Flower Motif Granny Square Tote Bag”