
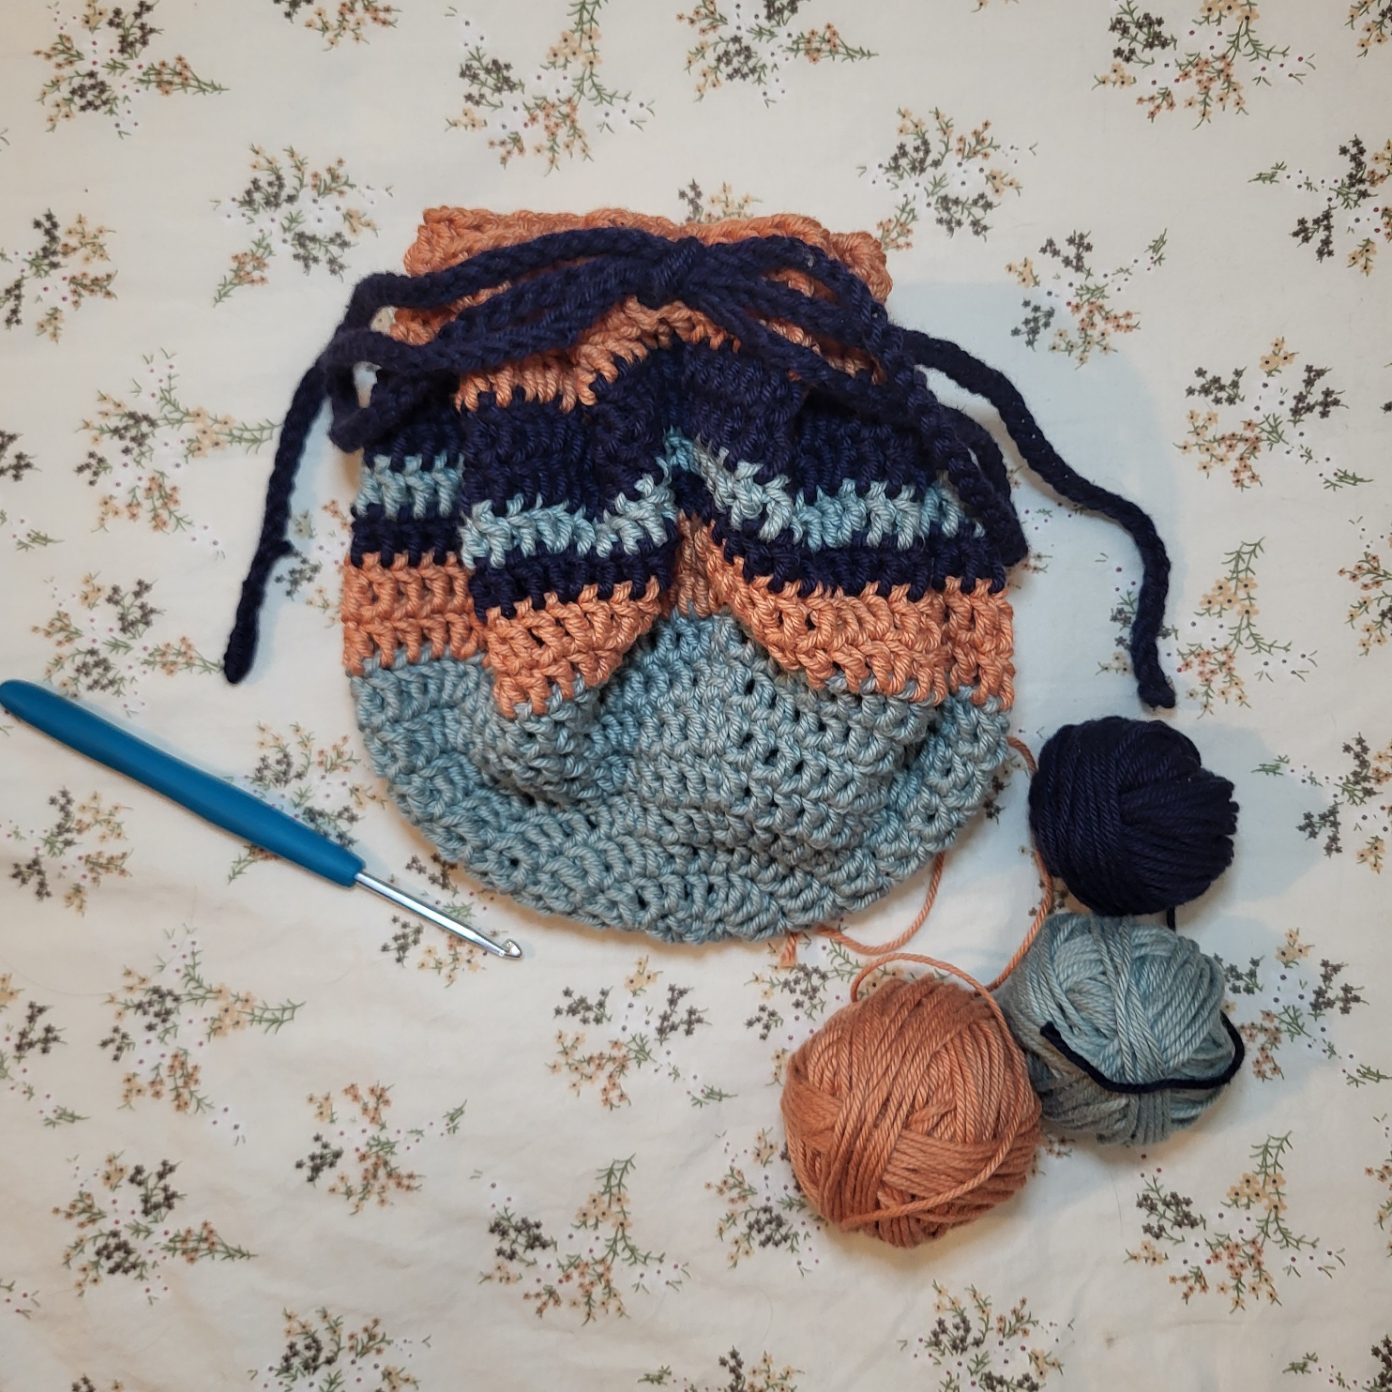
What’s that quote? “Necessity is the mother of Invention?” I’m lucky to have friends who love to give each other gifts in reusable bags. I needed something for a gift, and I’ve always wanted to make a drawstring pouch. I’ve seen the lay flat bags online a bunch already, and I knew I had to make one!

I had some leftover Dishie yarn from a previous project, and I thought it would be a perfect way to use up the leftovers! I love the soft cotton yarn of the dishie, and despite the name, it can be used for more than just dishcloths! I love this yarn especially because it’s softer than other cotton yarns when it works up it will maintain its shape without being bulky.
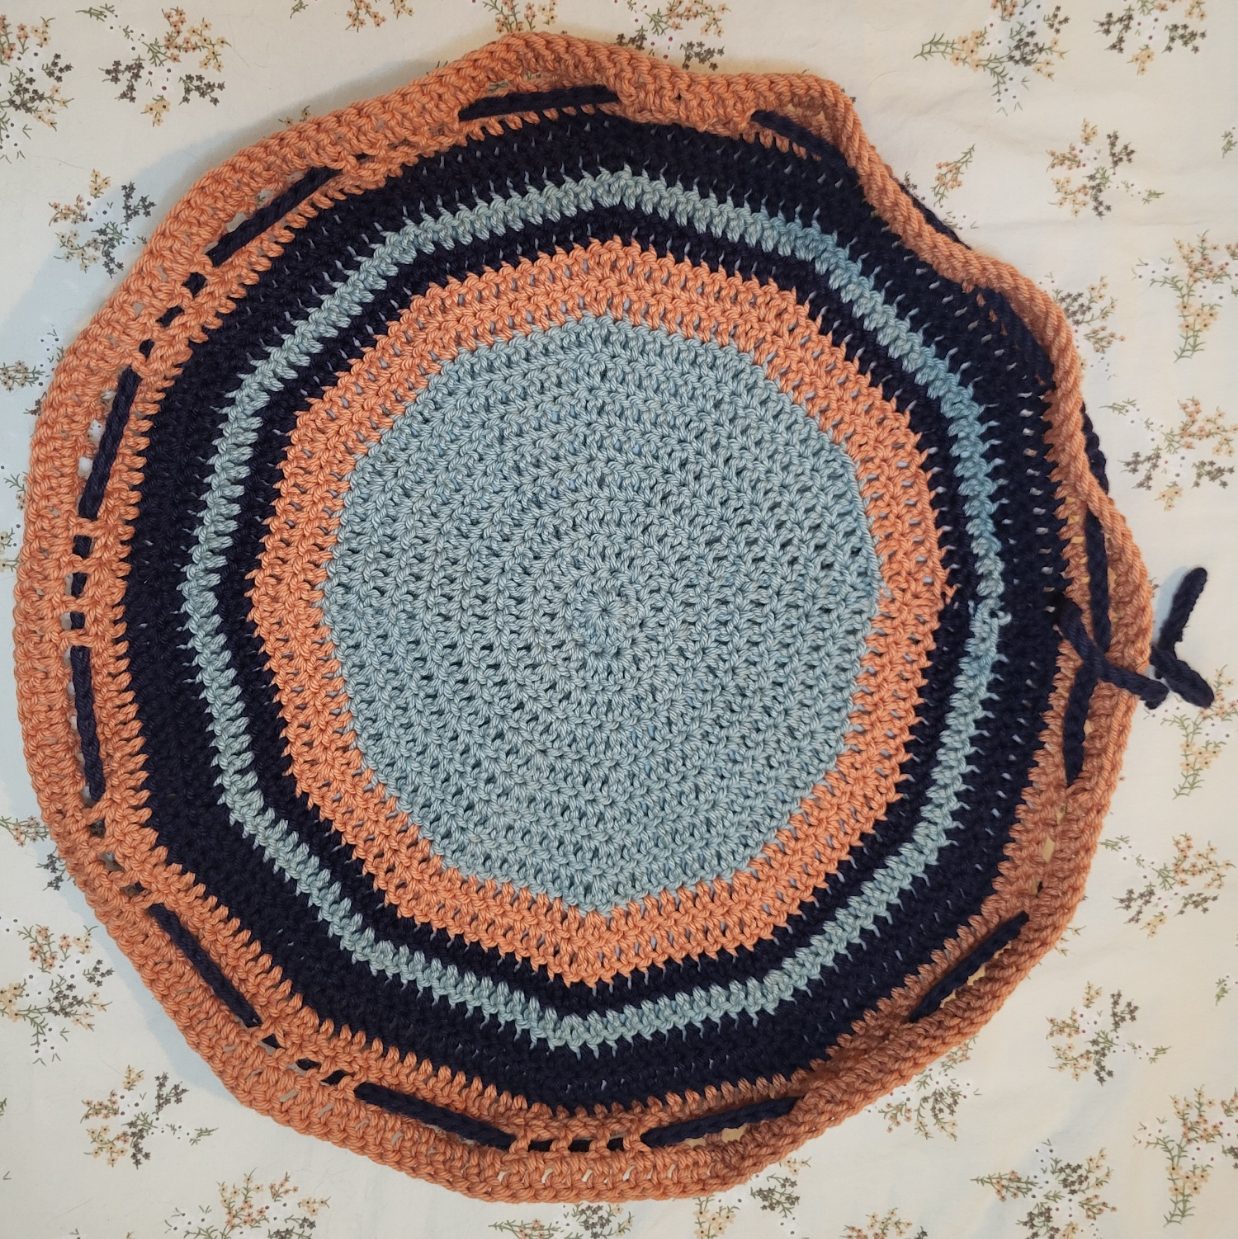
While in the process of making this pouch, I realized there are so many other uses for it. Obviously it can be used to hold gifts, but you can also use it as a makeup holder and mat. You could use it to hold other small items as well. And for the nerdy inclined, of course, it’s a dice holder and will second as a playing mat!

The possibilities of this bag are endless, not in terms of what to hold in the bag, but you can make the circle as large or as small as you would like. If you have more makeup (or more dice) you can make a larger bag to hold more stuff, and to have a larger space to lay everything out in. A smaller bag would also work great to keep in a purse or tote!

Construction of the bag is super easy, as it’s just a flat circle. It’s also super customizable as you can use any variety of different yarn colors or types. It would also look super awesome with a different type of drawstring. Either a leather piece for a more refined look; or if you’re looking for something more utilitarian, a shoestring!
Pattern:
Materials:
3 Skeins of Knit Picks Dishy Cotton yarn
Size 4mm crochet hook
Yarn Scissors
Tapestry needle
Legend:
Ch – Chain
st – Stitch
DC – Double Crochet
sl st – slip stitch
Instructions:
Ch 3
Round 1: In 1st st, 11 dc, sl st to join (12)
Round 2: Ch 2, DC in ch st, 2 dc in each st around, sl st to join (24)
Round 3: Ch 2, DC in ch st, {1 DC in next st, 2 DC, in next st} Repeat {} until last st, DC, sl st to join (36)
Round 4: Ch 2, DC in ch st, {2 DC in next 2 st, 2 DC, in next st} Repeat {} until last st, DC, sl st to join (48)
Round 5: Ch 2, DC in ch st, {3 DC in next 3 st, 2 DC, in next st} Repeat {} until last st, DC, sl st to join (60)
Round 6: Ch 2, DC in ch st, {4 DC in next 4 st, 2 DC, in next st} Repeat {} until last st, DC, sl st to join (72)
Round 7: Ch 2, DC in ch st, {5 DC in next 5 st, 2 DC, in next st} Repeat {} until last st, DC, sl st to join (84)
Continue adding 1 additional stitch between each “2 DC” stitches, which will create 12 additional stitches each round. Plug in your additional number for each “#” spot
Round 8 – ?: Ch 2, DC in ch st, {# DC in next # st, 2 DC, in next st} Repeat {} until last st, DC, sl st to join (increase by 12 each round)
Keep increasing rounds until you’ve reached your desired circumference.
You can change colors at any beginning of a round, creating a pattern you love!
Drawstring Row: On an even number of increases row: ch 3, {sk st, 1DC in next st, ch 1} repeat {} until end, sl st to join.
Next Row: Ch 2, 1 DC in each st around.
Create a drawstring using chains or an icord, whichever method you prefer! Weave the cord in and out of every 3rd space, and pull tight! Finish with a bow to hold closed. You can also tie together the two ends to make sure it doesn’t come apart from the lay-flat pouch.
