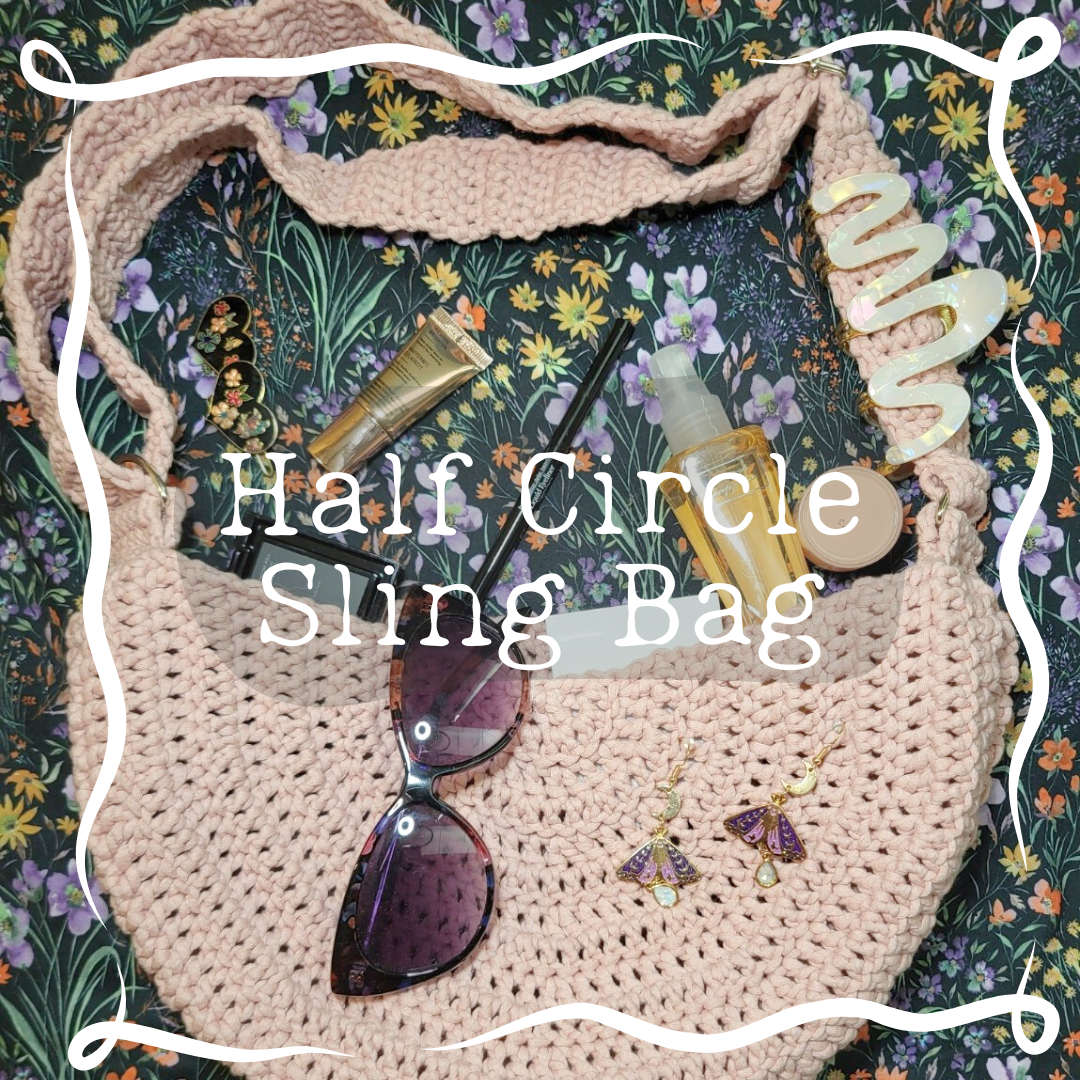
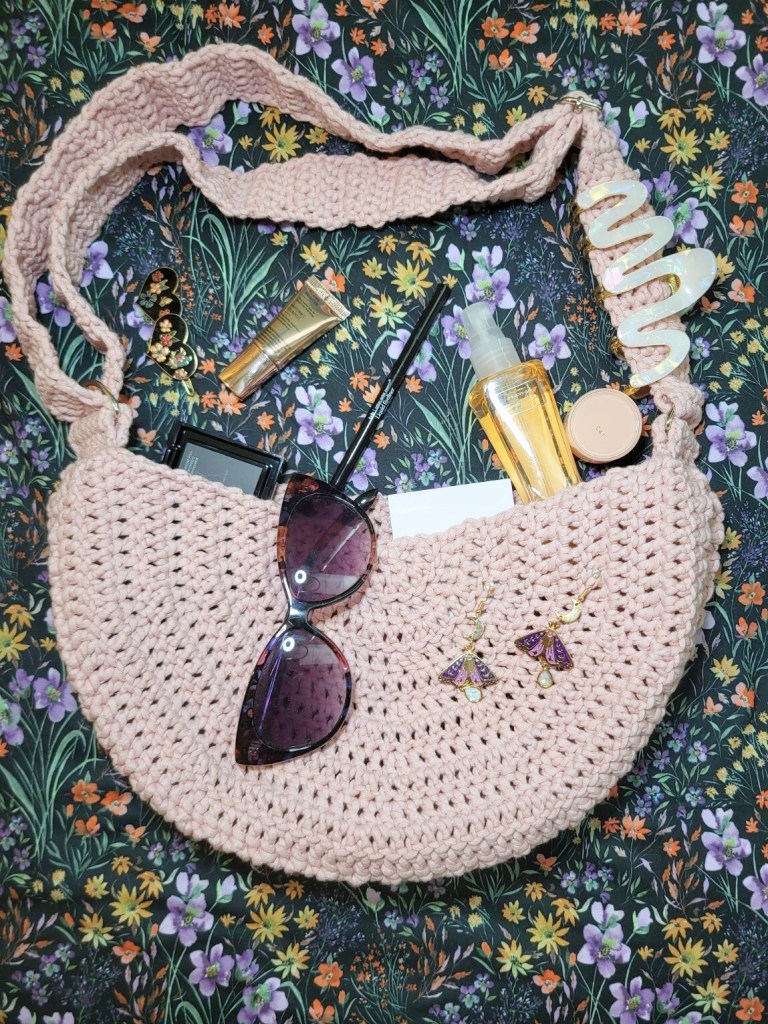
What’s the phrase? “Necessity is the mother of invention”? That phrase has applied so well for my next project. I was looking for a small simple bag to take with me on walks without having to lug around my whole purse. I didn’t really want to buy another item, when I can just buy more yarn instead! Thus, the Half circle sling bag was created.
This time I wanted to try something a little different with my pattern making process. Actually making a mock-up! What! Crazy right? I honestly usually create a little too impulsively, but this time I wanted to make sure I had something that worked and I really liked before jumping right into a project. Obviously, worse case scenario, if it didn’t work out I could just a buy a purse…. but where’s the fun in that?
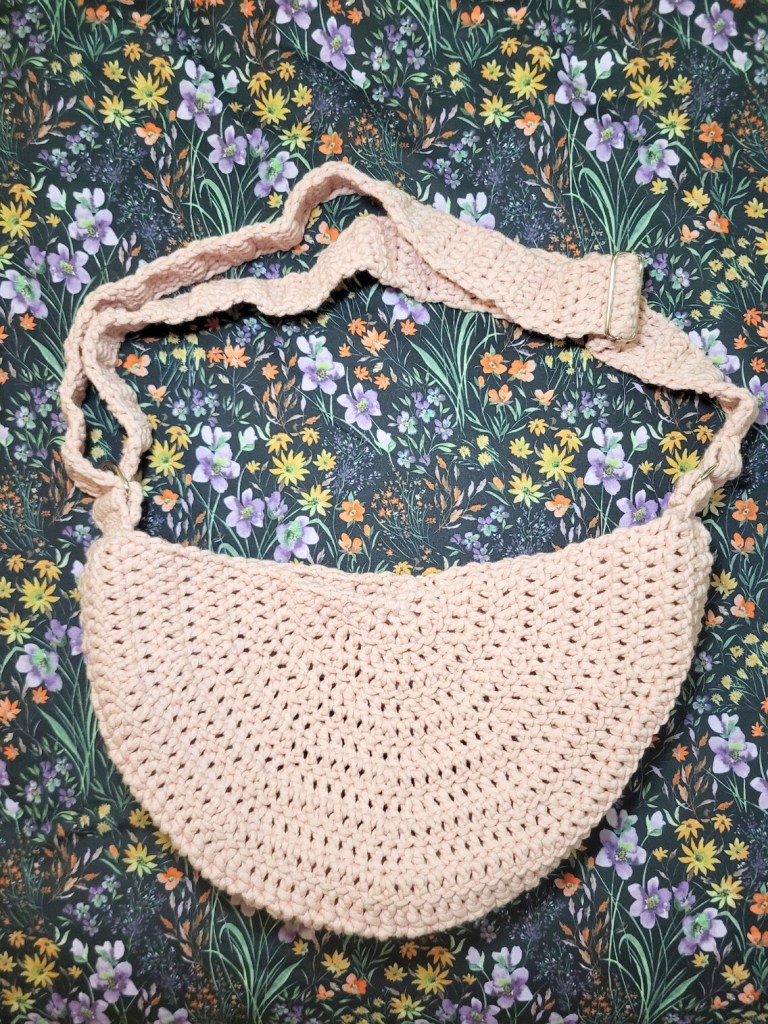
I’ve always wanted to make something beautiful with the Bernat Maker’s Yarn. I see it in the craft store all the time, and have never had a good idea for a piece. Until now! I never hit add to cart so fast! Especially with this adorable peachy color, I knew that was the perfect yarn for my project. I’ve never worked with it before, and it was super easy and smooth to use. The yarn felt perfect for a beginner project, because the stitches were so easy to see! However, the bad was also that the stitches were easy to see. If an error was made, it seemed a lot harder to hide the stitches in the work, or that a mistake would become hidden by the yarn. It seemed all on display! However, with this simple pattern I was creating, creating beautiful stitches was easy as pie.
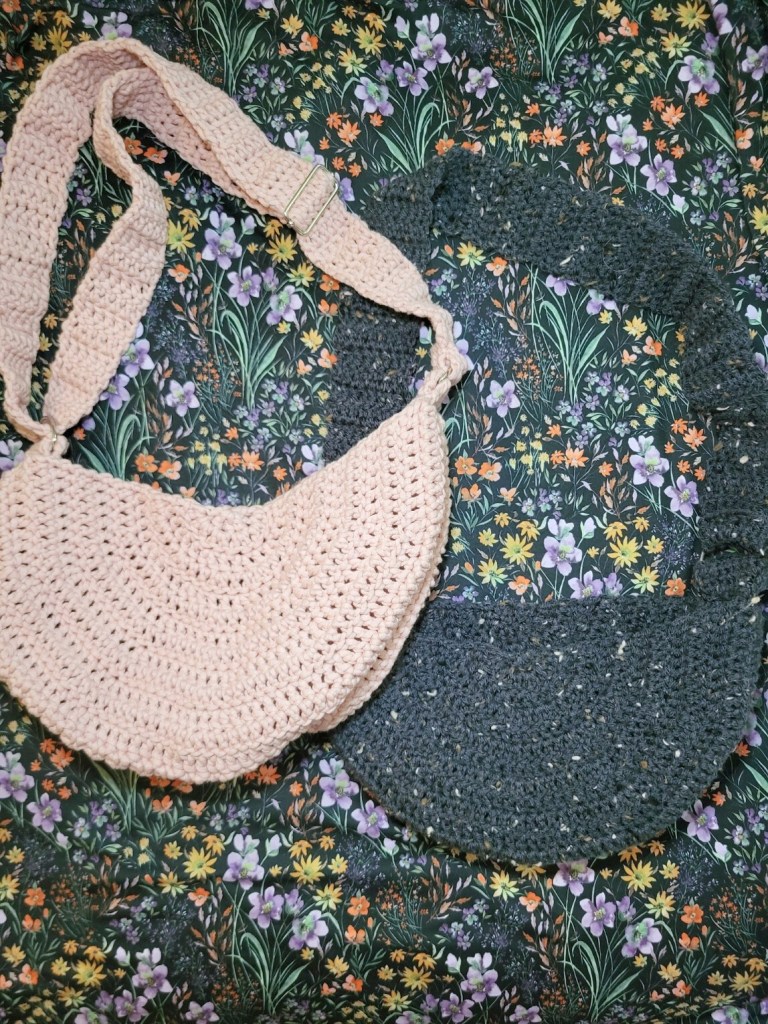
Like most of the items I create, I try to make them as customizable as possible. Although I’m now in love with the Maker Yarn, there’s no reason to stick with it! Any yarn will do really, although for the life of your item, I would try to stick to a sturdy somewhat thicker weight yarn, just to make sure your project lasts! The first one I made in a basic worsted acrylic, although cute, doesn’t feel like it would last in the elements as say a cotton weight yarn might! Use your discretion! Also feel free to create as many (or as little) half rows as you would like to determine the size of your bag. It’s all up to you! Have fun with it!
Pattern
Materials:
One skein Bernat Maker yarn
Size 6mm crochet hook
Two D-Rings 1.5 inch
One adjustable buckle slides 1.5 inch
yarn needle
scissors
Optional: Pre-made purse strap
Legend:
ch – chain
sc – single crochet
dc – double crochet
sl st – slip stitch
Notes:
turning chain counts as first stitch
Instructions:
Body of purse – make two:
ch 3
Row 1: in 1st ch, 5dc, ch 2, turn (6)
Row 2: dc in ch st, 2dc in each st across, ch 2, turn (12)
Row 3: dc in ch st, 1dc in next st, {2dc in next st, 1dc in next st} repeat until end, ch 2, turn (18)
Row 4: dc in ch st, 1dc in next 2 sts, {2dc in next st, 1dc in next 2 sts} repeat until end, ch 2, turn (24)
Row 5: dc in ch st, 1dc in next 3 sts, {2dc in next st, 1dc in next 3 sts} repeat until end, ch 2, turn (30)
Row 6: dc in ch st, 1dc in next 4 sts, {2dc in next st, 1dc in next 4 sts} repeat until end, ch 2, turn (36)
Row 7: dc in ch st, 1dc in next 5 sts, {2dc in next st, 1dc in next 5 sts} repeat until end, ch 2, turn (42)
Row 8: dc in ch st, 1dc in next 6 sts, {2dc in next st, 1dc in next 6 sts} repeat until end, ch 2, turn (48)
Row 9: dc in ch st, 1dc in next 7 sts, {2dc in next st, 1dc in next 7 sts} repeat until end, ch 2, turn (54)
Row 10: dc in ch st, 1dc in next 8 sts, {2dc in next st, 1dc in next 8 sts} repeat until end, ch 2, turn (60)
Row 11: dc in ch st, 1dc in next 9 sts, {2dc in next st, 1dc in next 9 sts} repeat until end, ch 2, turn (66)
Row 12: dc in ch st, 1dc in next 10 sts, {2dc in next st, 1dc in next 10 sts} repeat until end, ch 2, turn (72)
Row 13: dc in ch st, 1dc in next 11 sts, {2dc in next st, 1dc in next 11 sts} repeat until end, ch 2, turn (78)
Joining the pieces together:
attach yarn at the beginning of the half circle
Row 1: ch 12, sl st to other half circle to join. ch 1, turn
Row 2: sc across, sl st in next 2 stitches on half circle body piece, ch 1 turn
Row 3: skip 2 sl st, sc across, sl st in next 2 st on half bottle piece, ch 1 turn
Repeat Row 3 until completely joined end at opposite side, bind off.
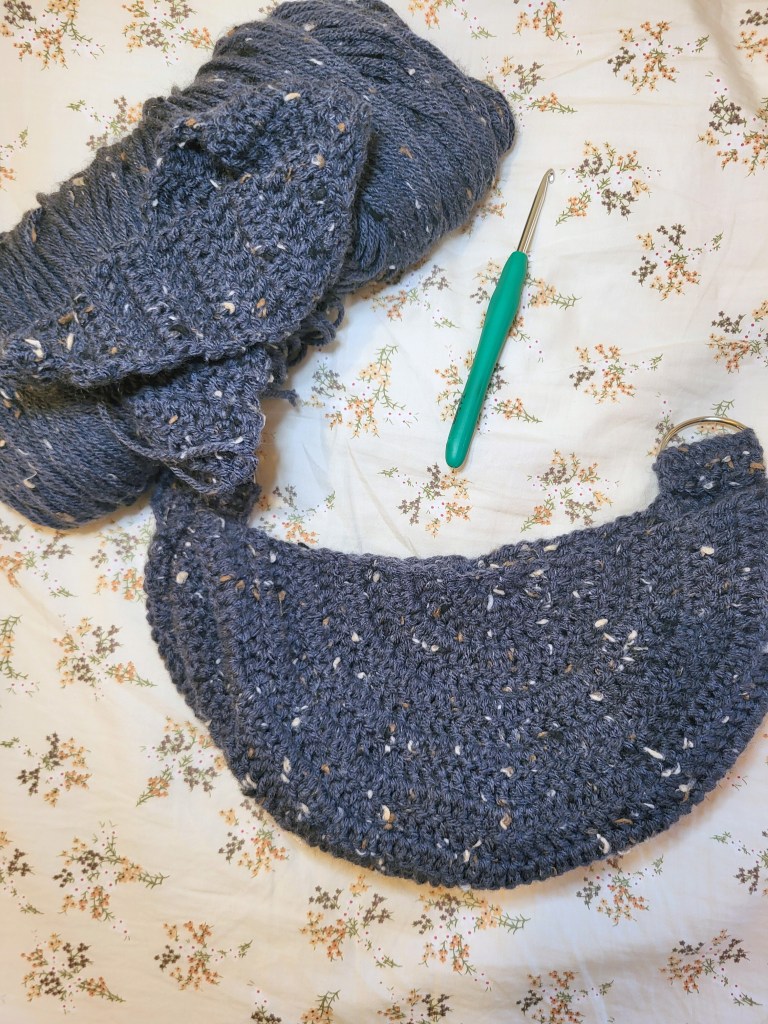
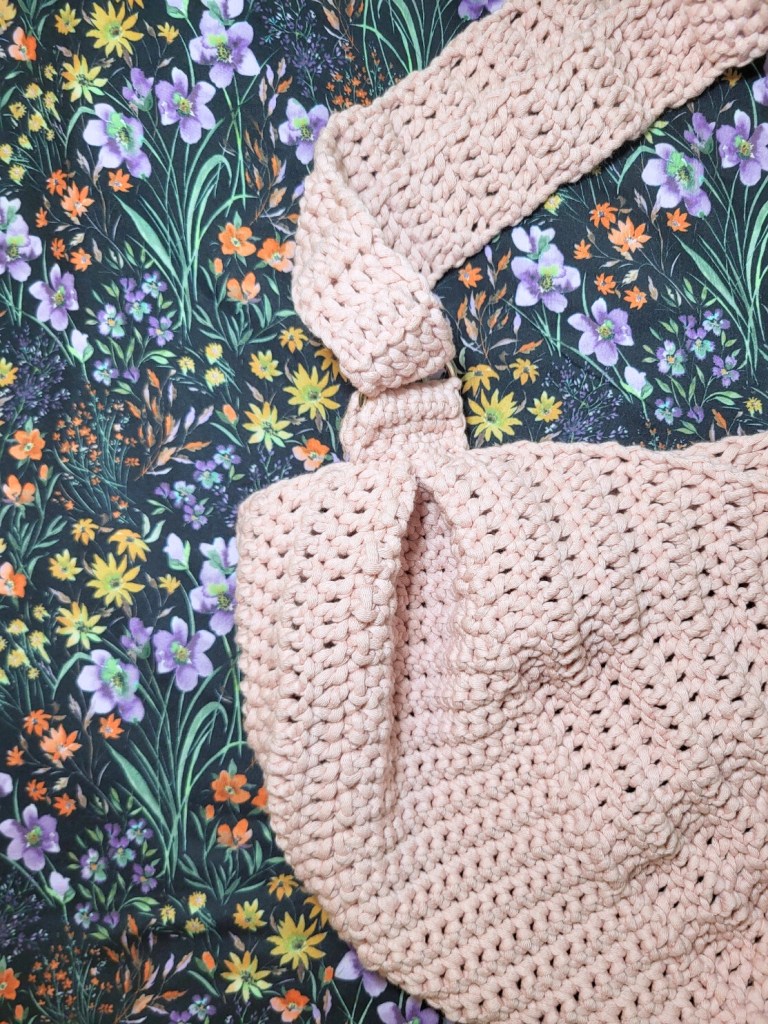
Attaching D-Rings
Fold the two body pieces so they meet, see below picture:
SC 8 stitches evenly through all layers.
Create 8 more rows of SC
Fold in D-Ring, matching 8th row of sc to the first, and sew together with excess yarn.
Repeat on other side
Strap:
ch 6,
Row 1: DC 6 across, ch 2, turn
Repeat until desired length.
For adjustable buckle:
fold middle piece of buckle to the end of strap and secure with excess yarn.
Feed through one D-Ring attached to body, and then feed end through Adjustable buckle.
Attach other end to other D- Ring.
You can also purchase a separate purse strap with clips so you can change it out as desired.
If you’re looking for a more secure strap, check out my tutorial: One Way Stretch Crochet Strap
