Diamonds are a Granny’s Best Friend Crochet Bag Line

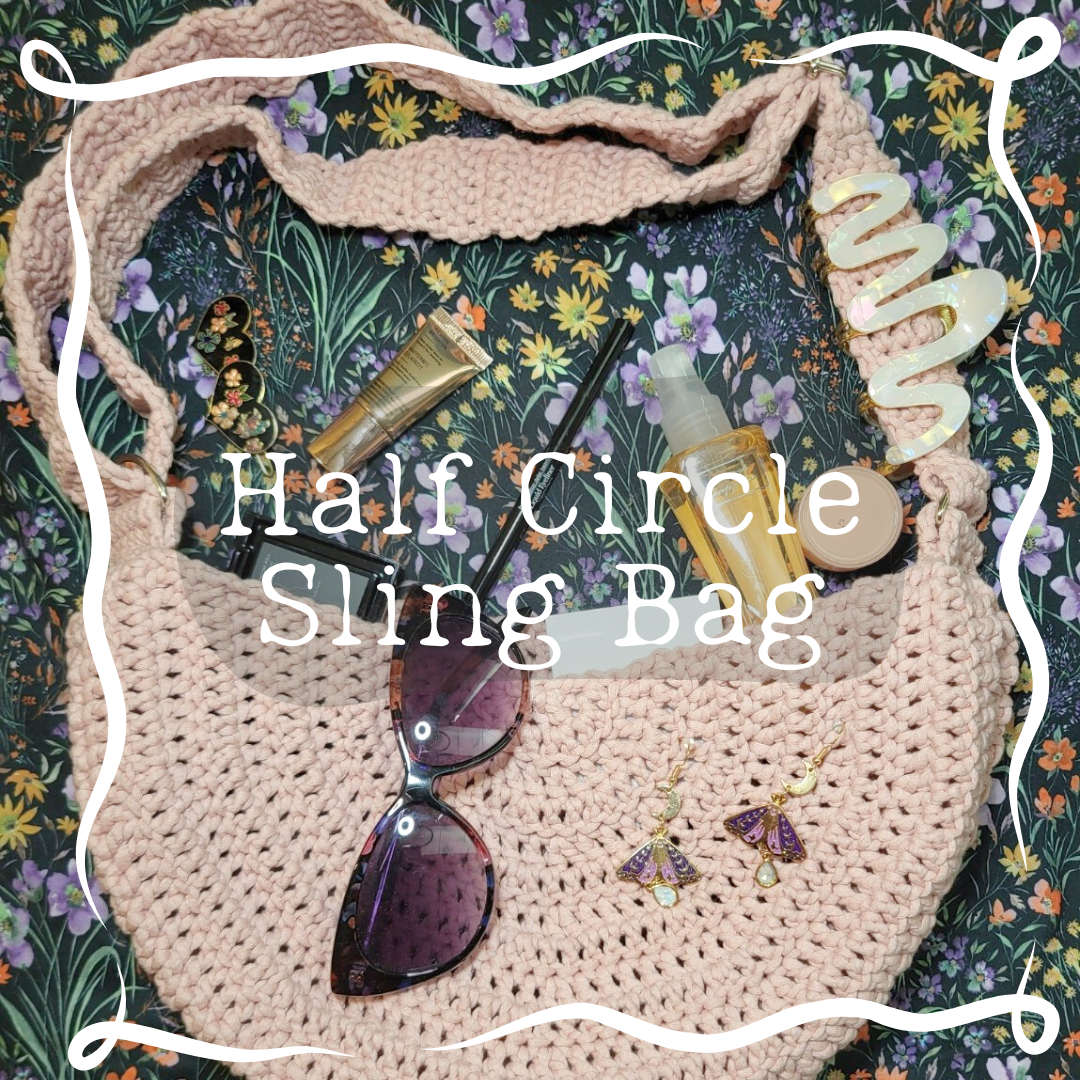
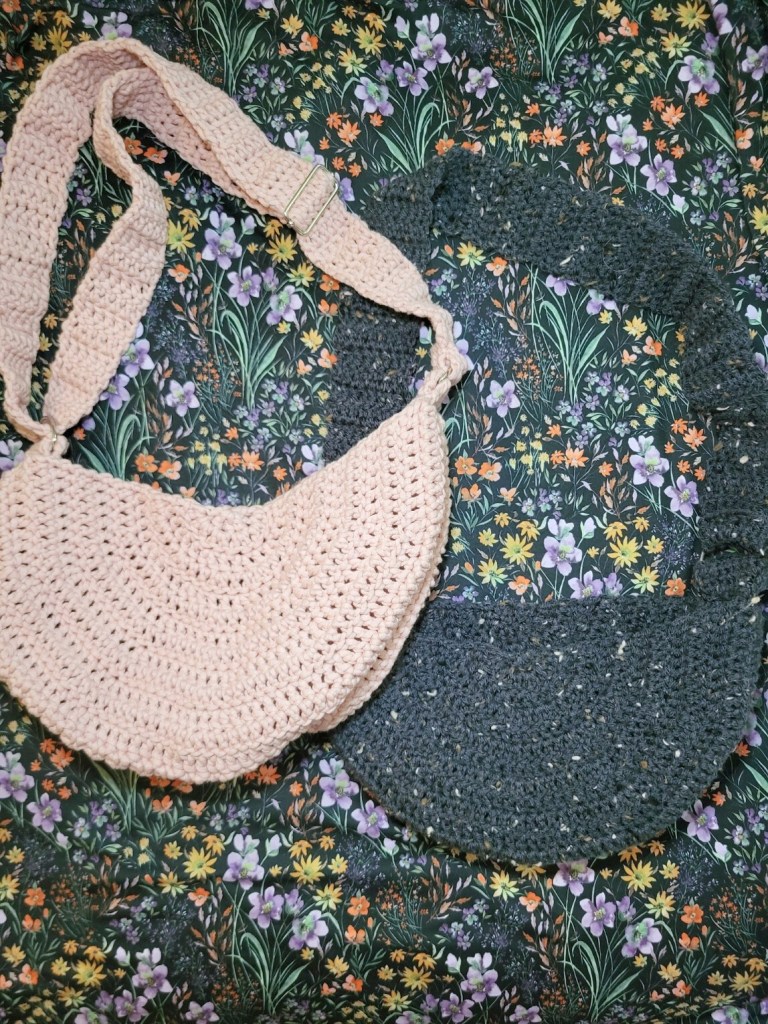
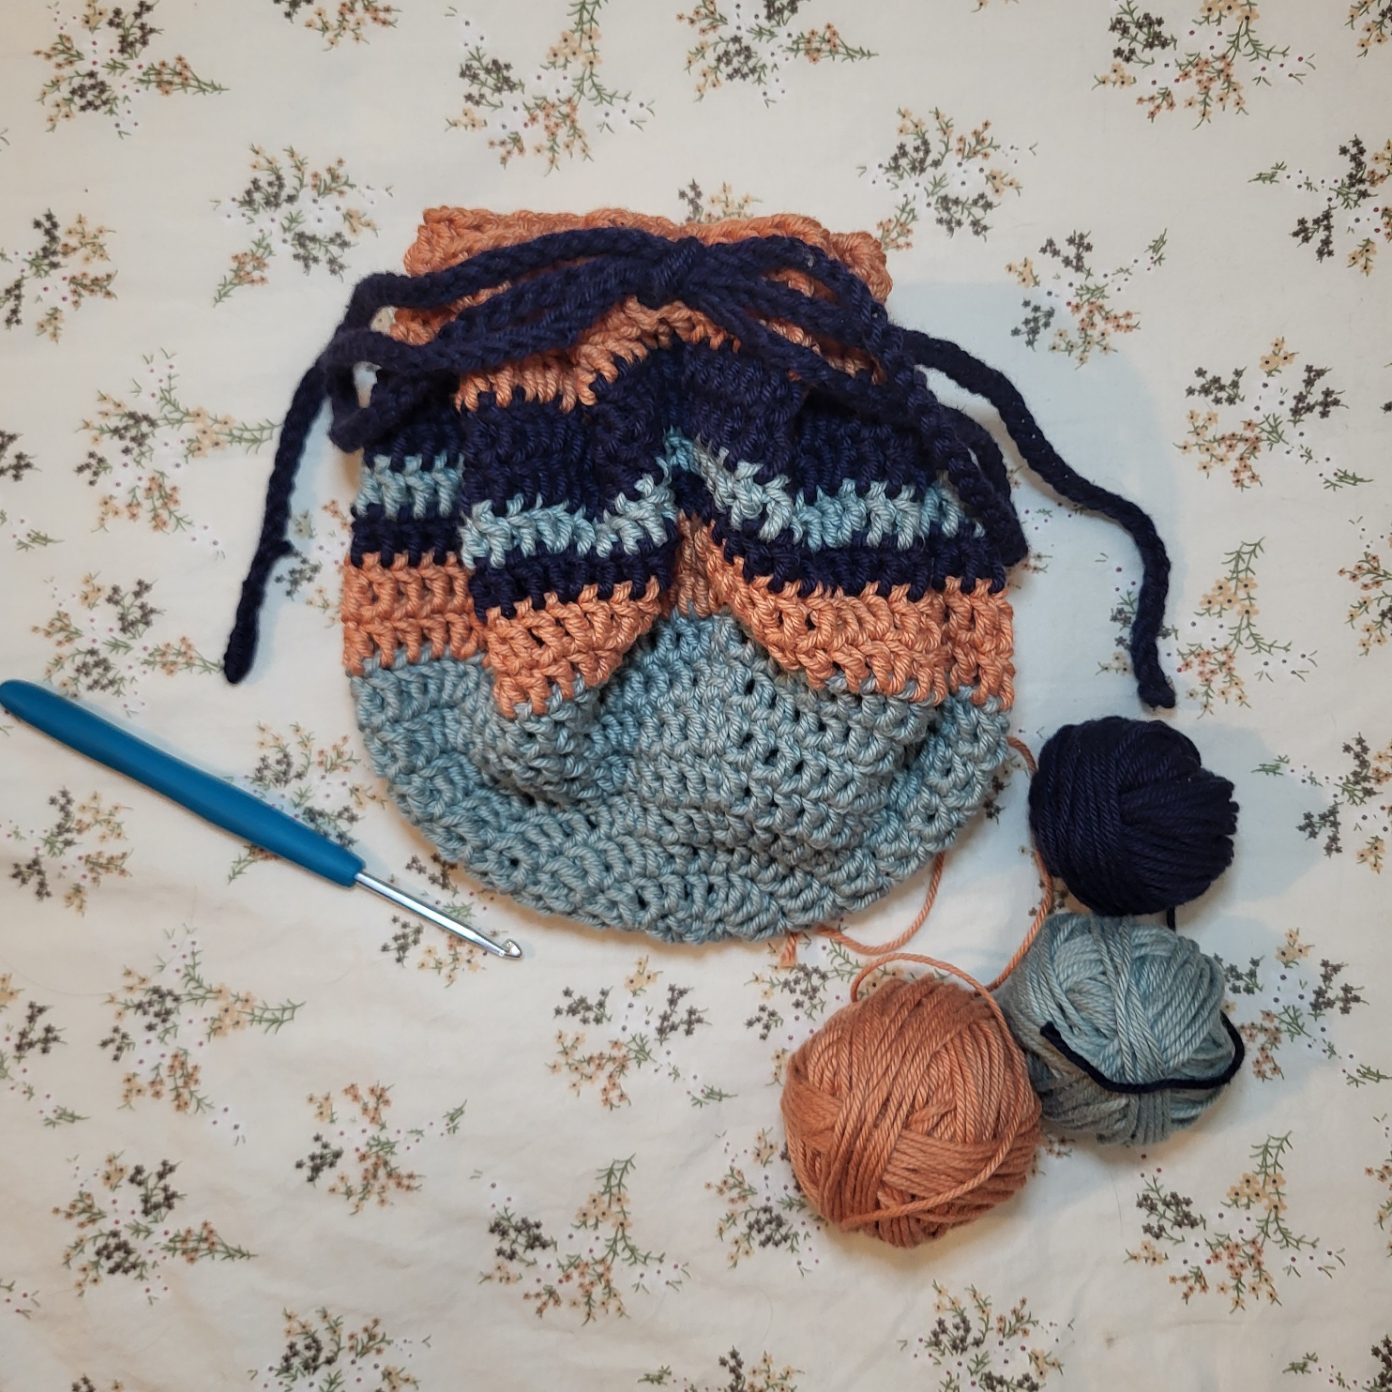
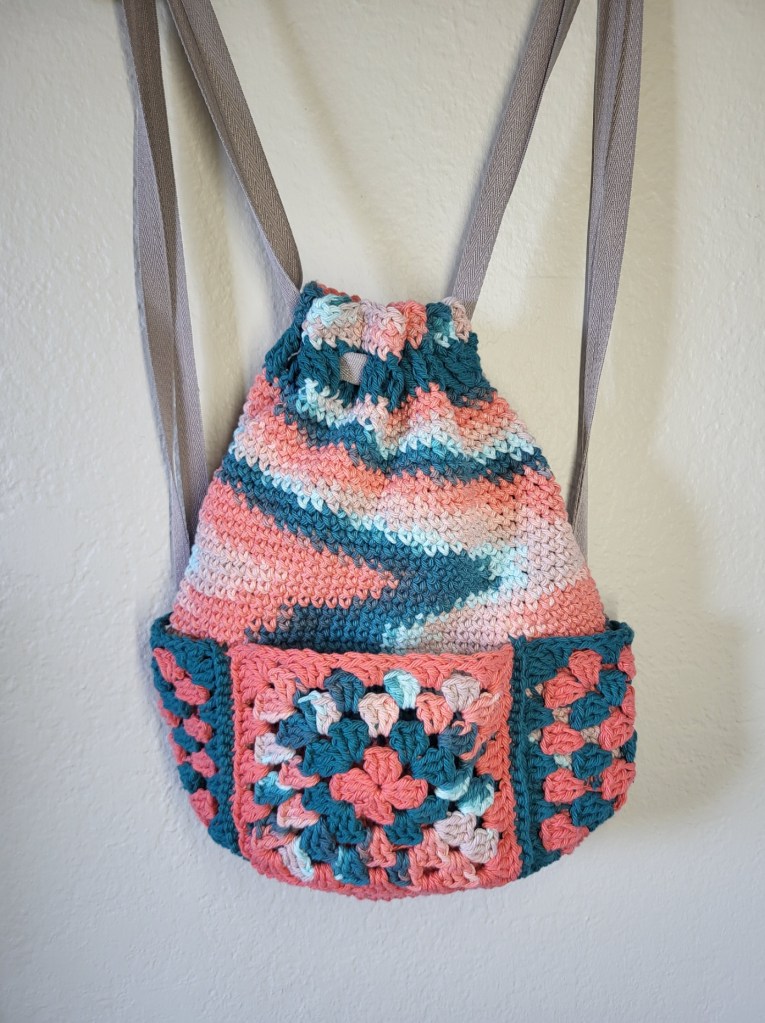
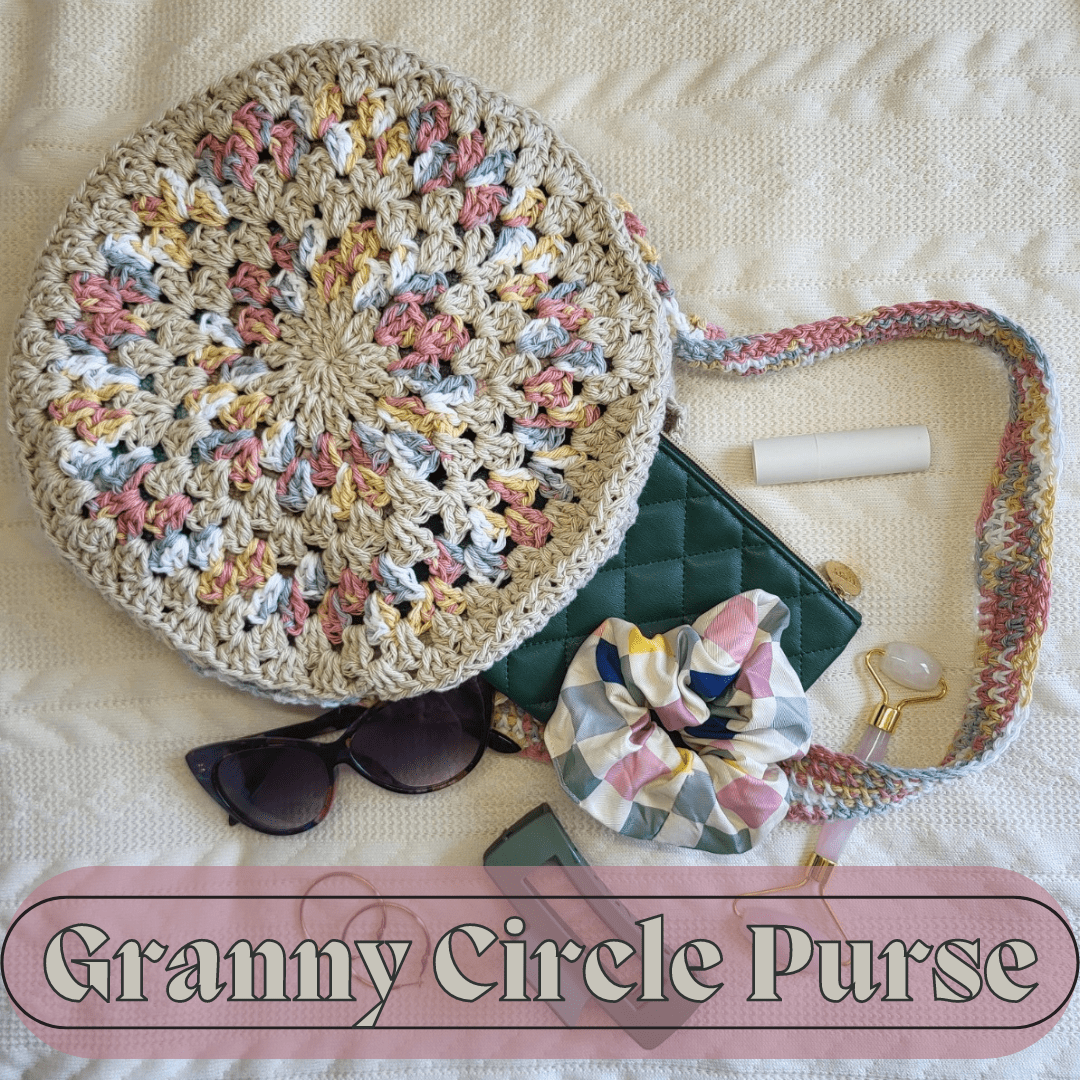
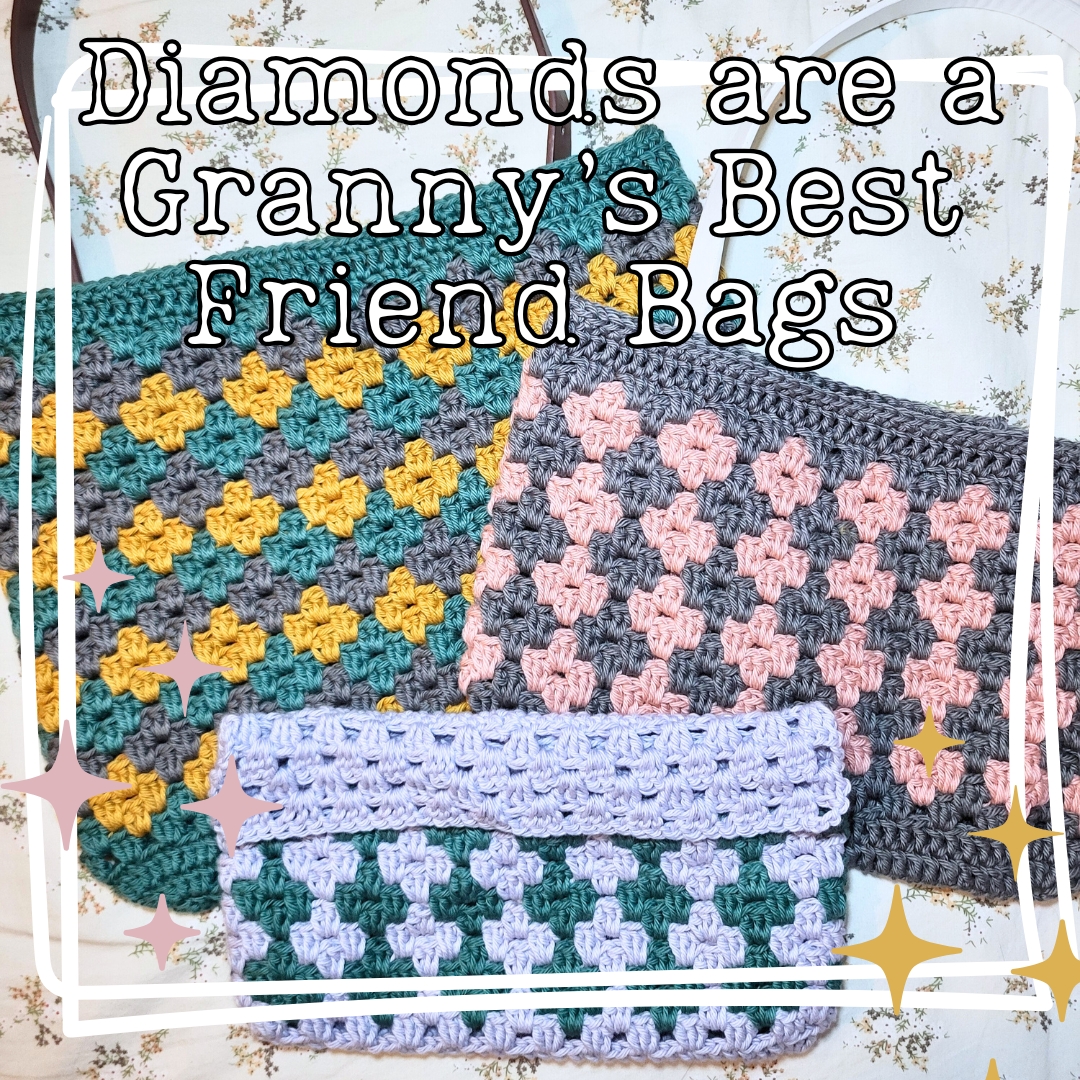
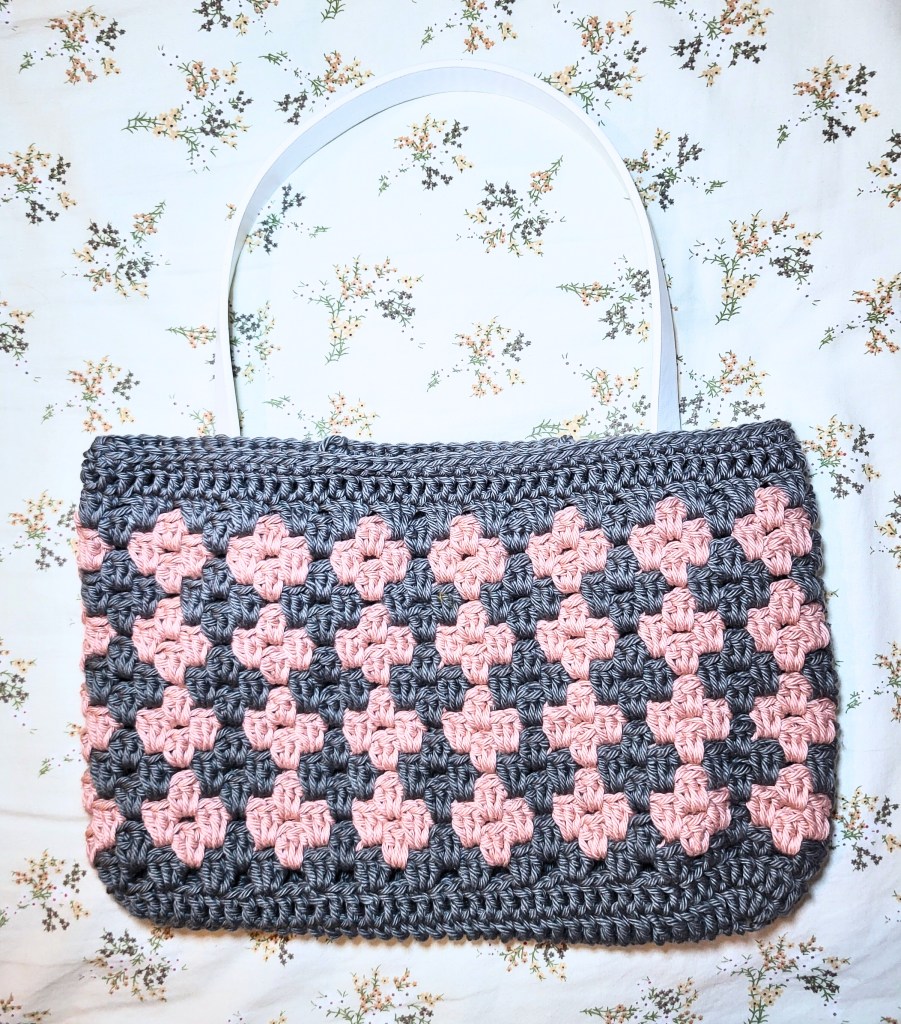
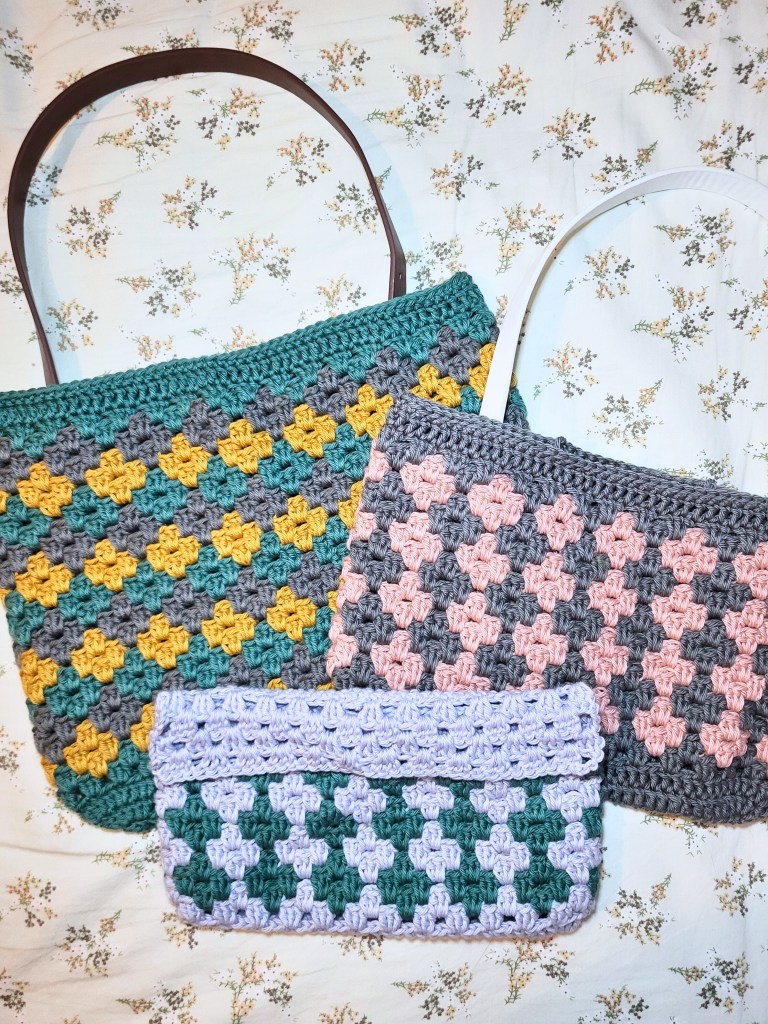
When inspiration strikes, it really strikes! I fell in love with a diamond granny stitch pattern I saw. I just knew I needed to make a tote bag out of it. Although, I couldn’t decide how big I wanted it, how many colors for the diamonds, etc. I realized then it would be pretty easy to make different sizes based on how many pattern repeats I wanted. Then, the Diamond Granny stitch bag line was born!

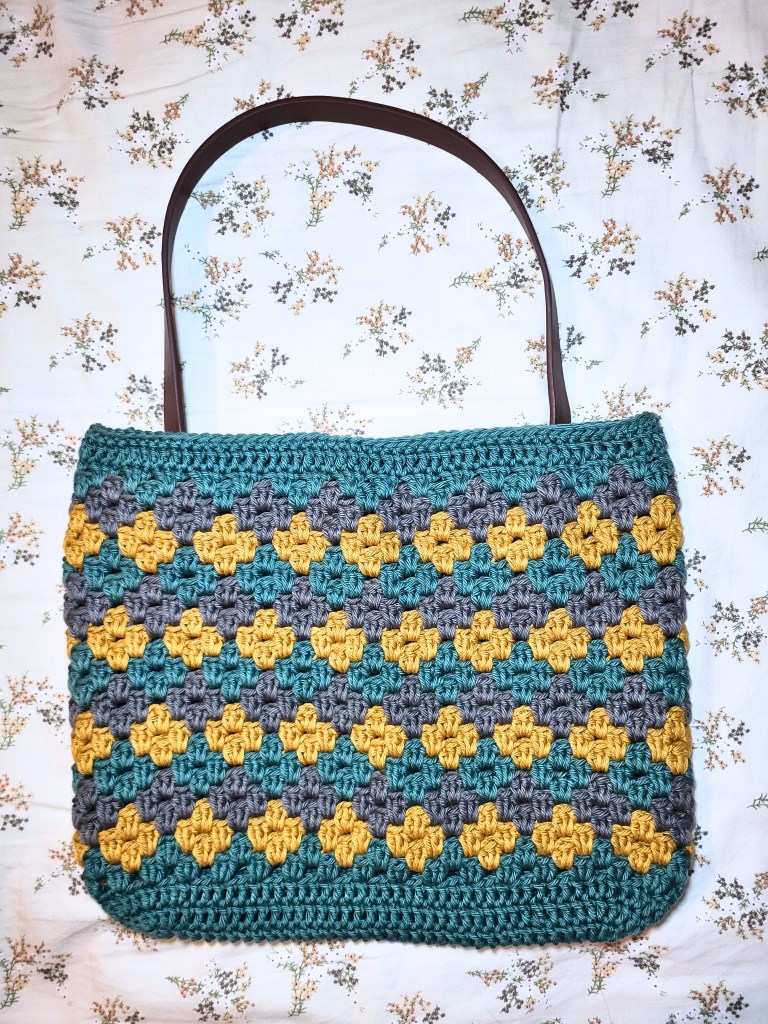
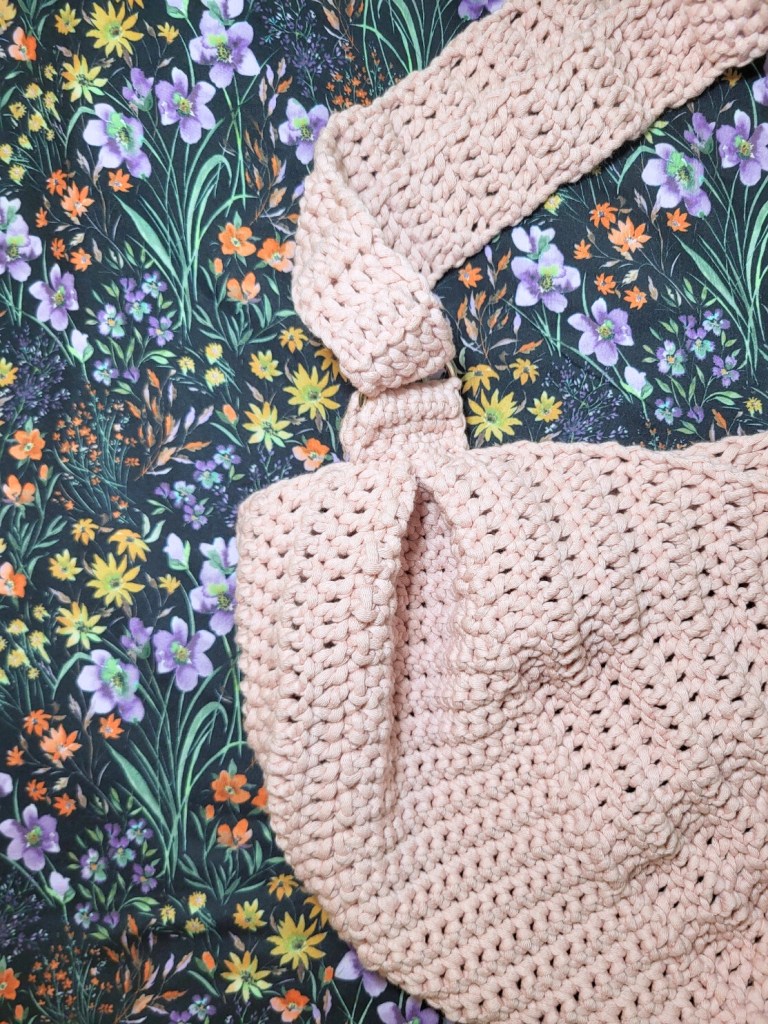
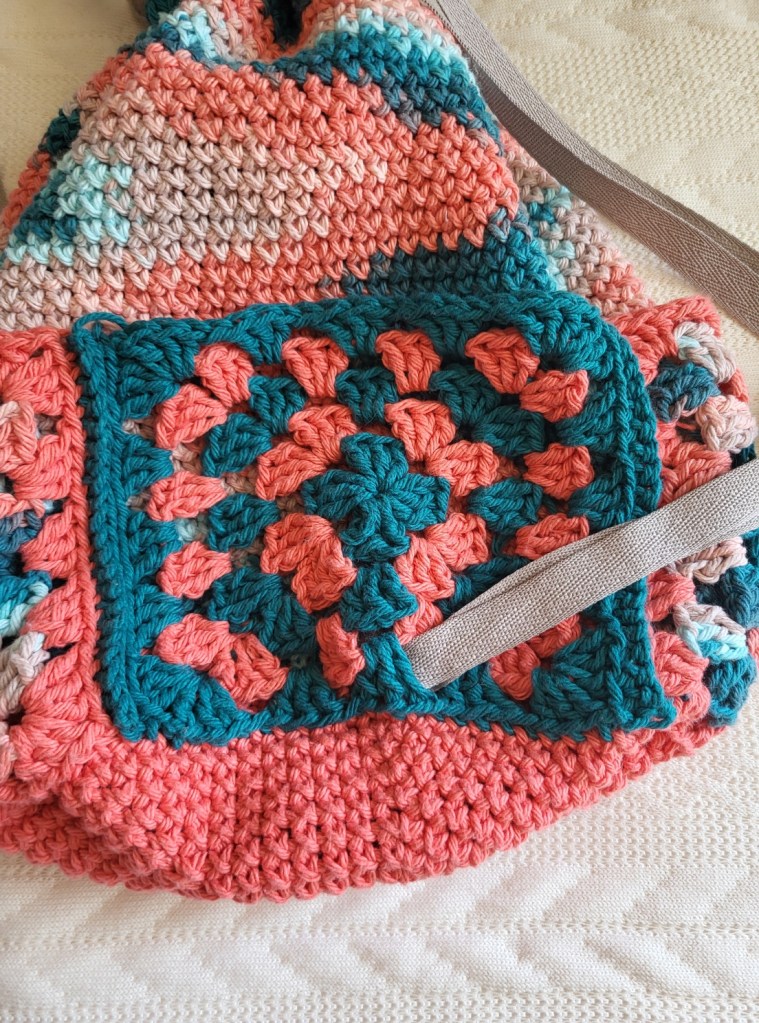
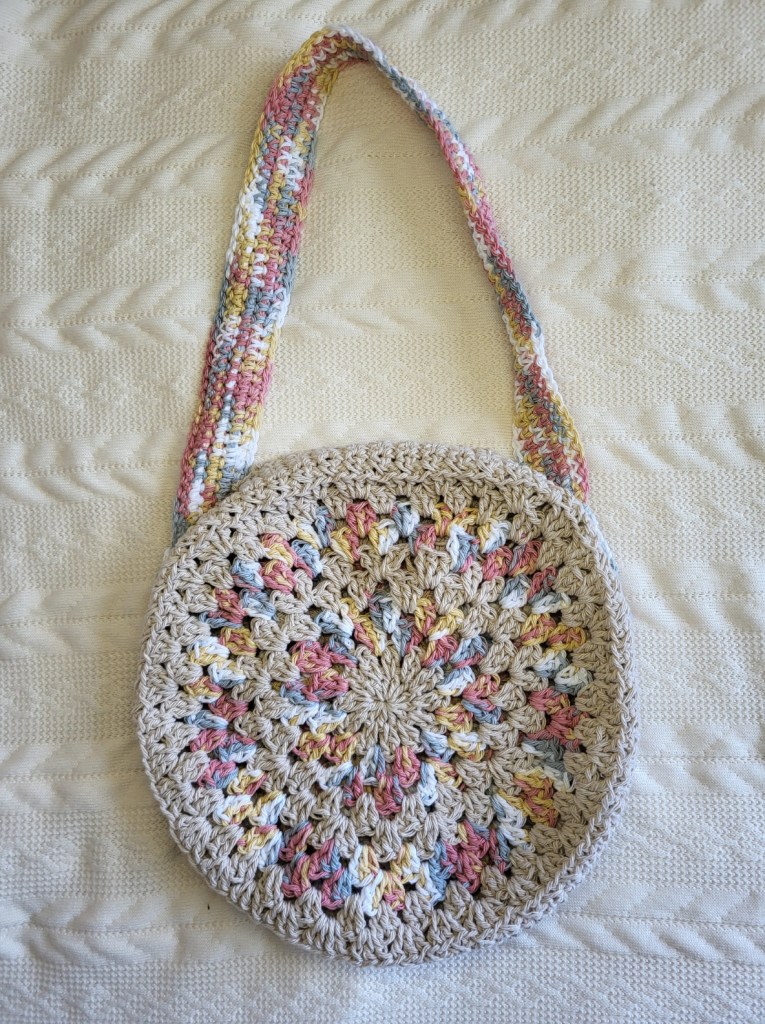
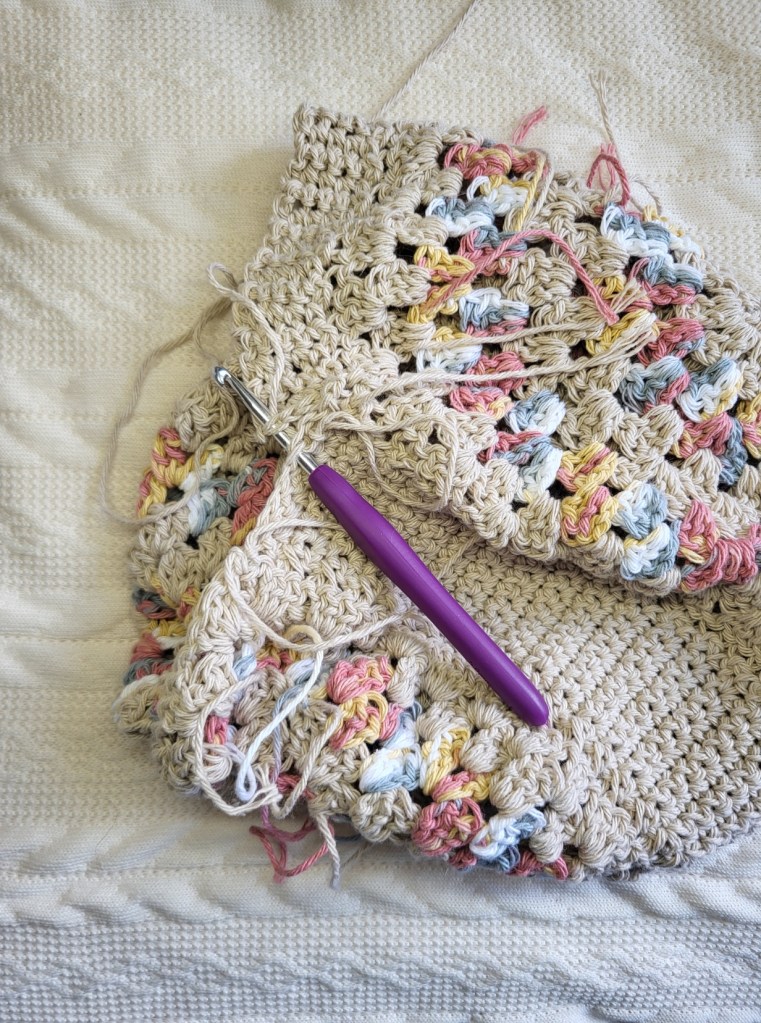
I started out with the big tote first, actually. The interesting thing with the diamond color-work of this stitch is that you don’t make chains between the clusters. Which, I actually love! I love a closer weave granny stitch. Not doing the chain stitch really brings out the pattern. It’s also quite fun to travel the yarn through the stitches. It ends up looking really complicated while you’re making it, but it’s actually fairly simple once you get the hang!

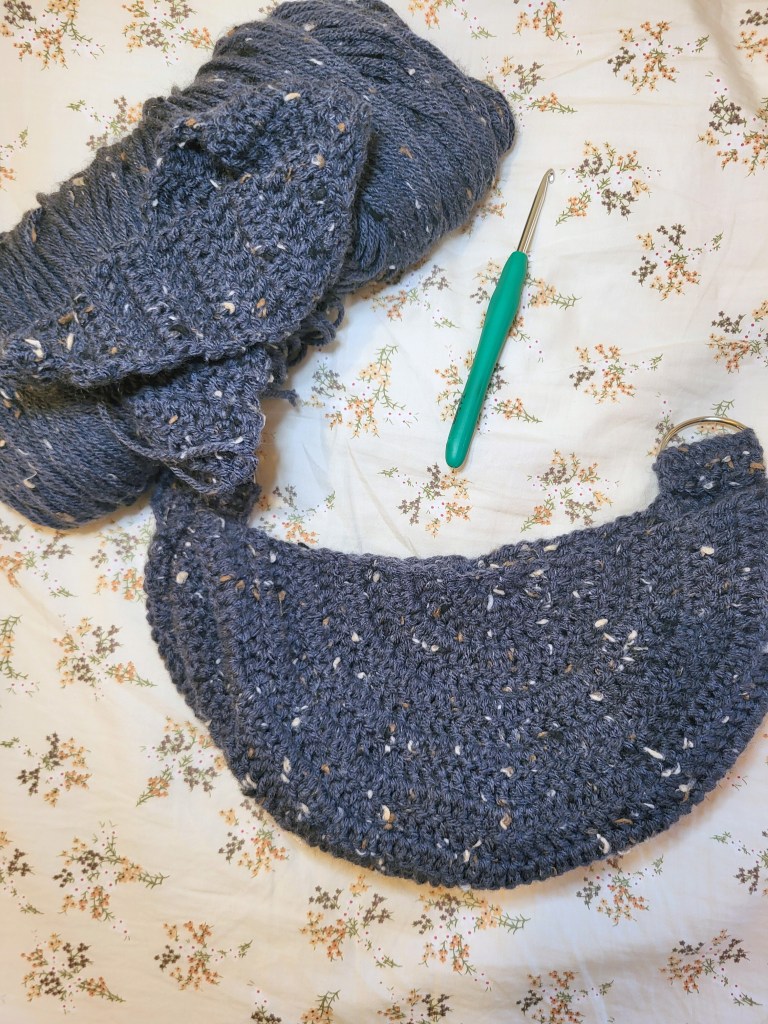
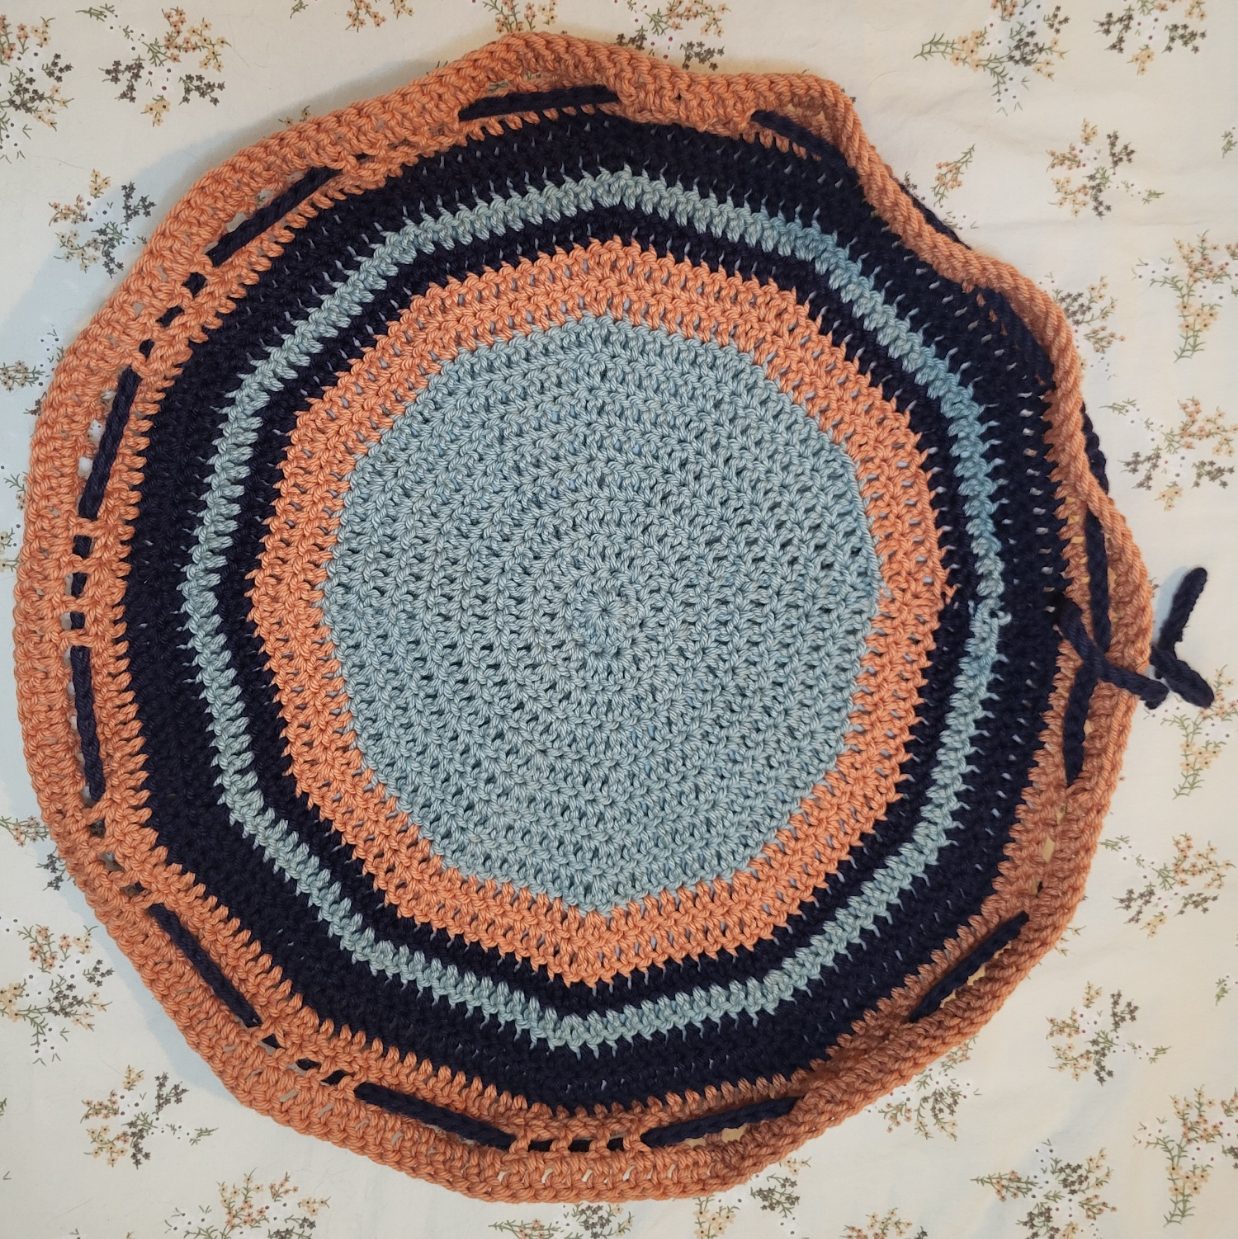
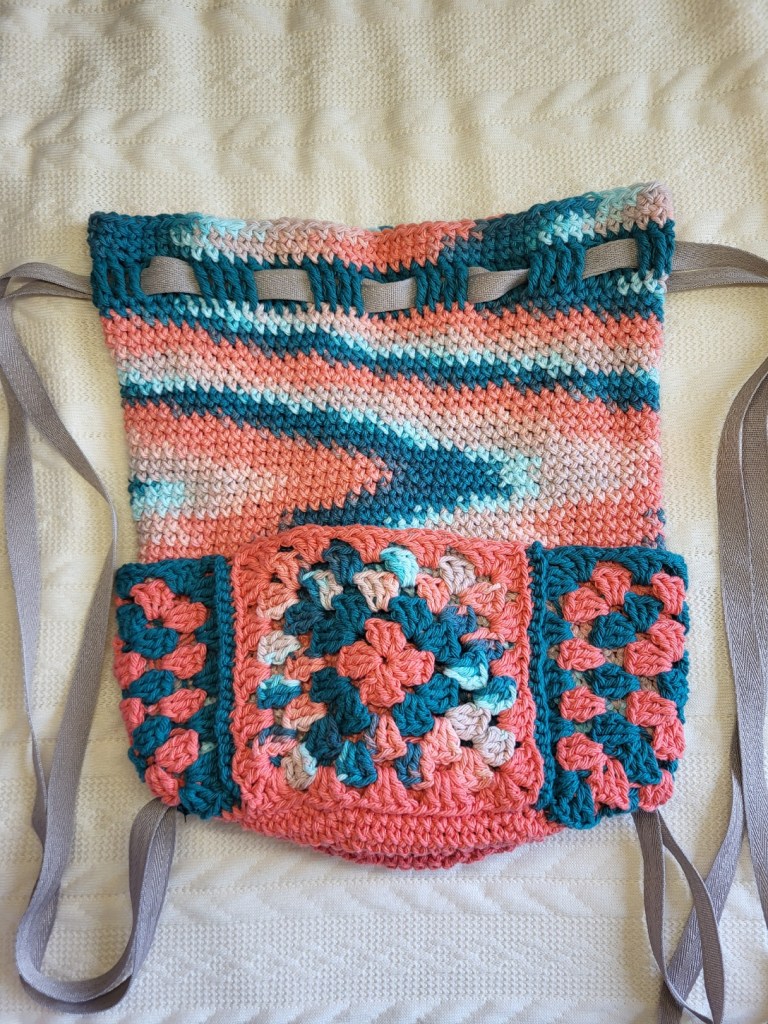
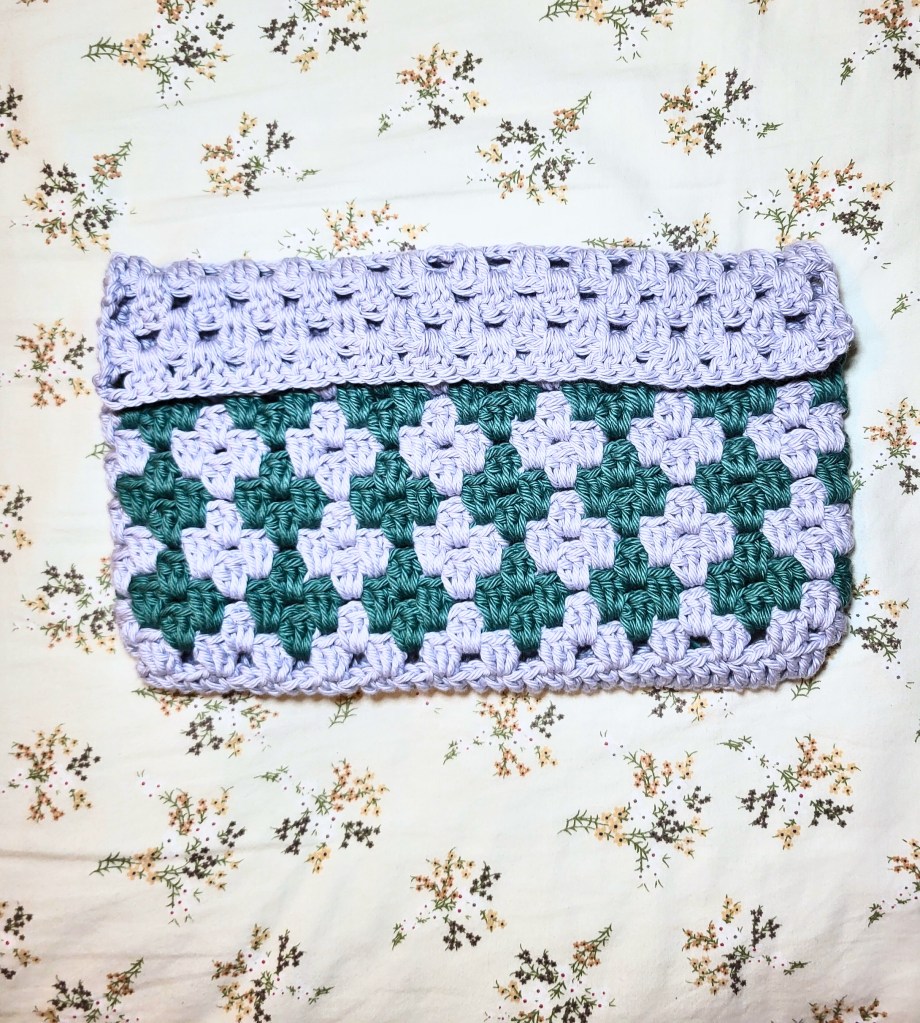
Think of it as alternating rows of one color and then another row of two colors. If you keep an eye on the pattern, it’s quite simple. I would recommend starting with the two color bags (either the medium bucket bag, or small purse) if you’re new to this type of color-work. The bottoms of the bag are created using an oval. You can make the bottoms of the bags wider if you would like by adding more rows. Just keep in mind that will also create more diamond stitches as you work up the rest of the pattern.

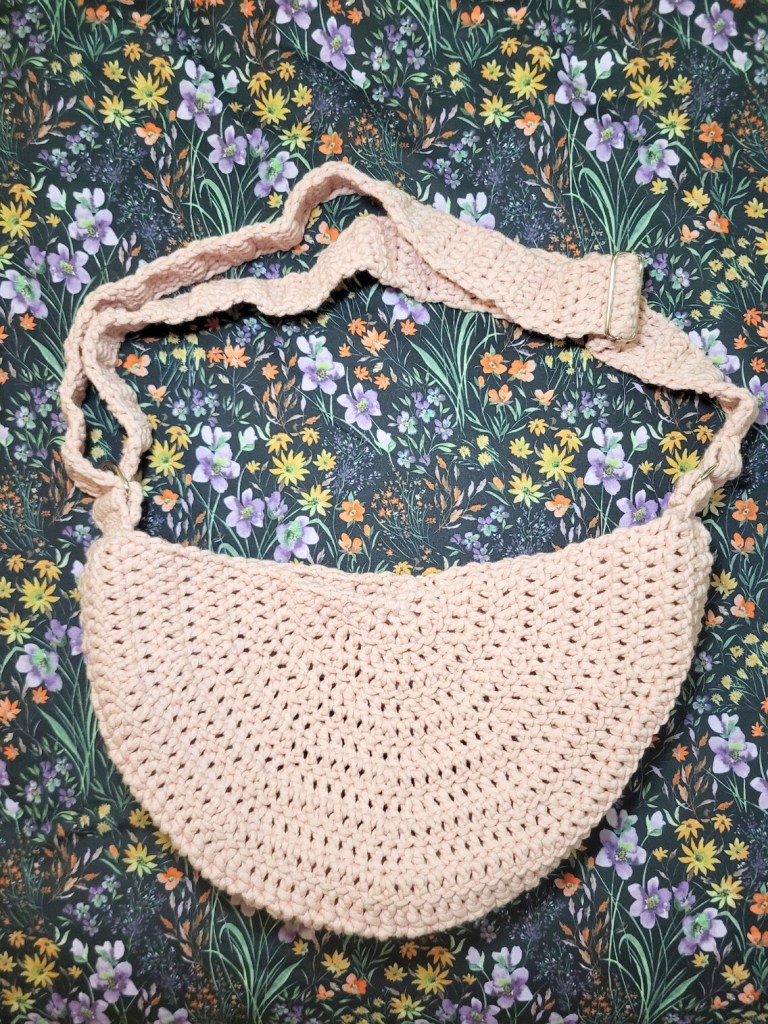
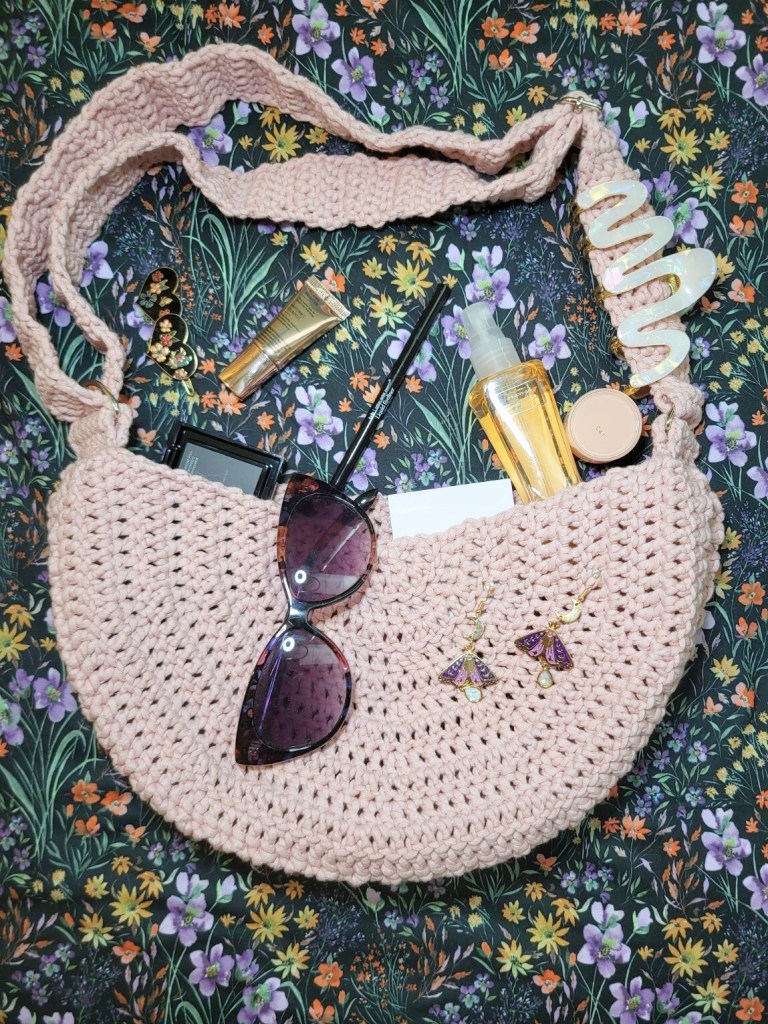
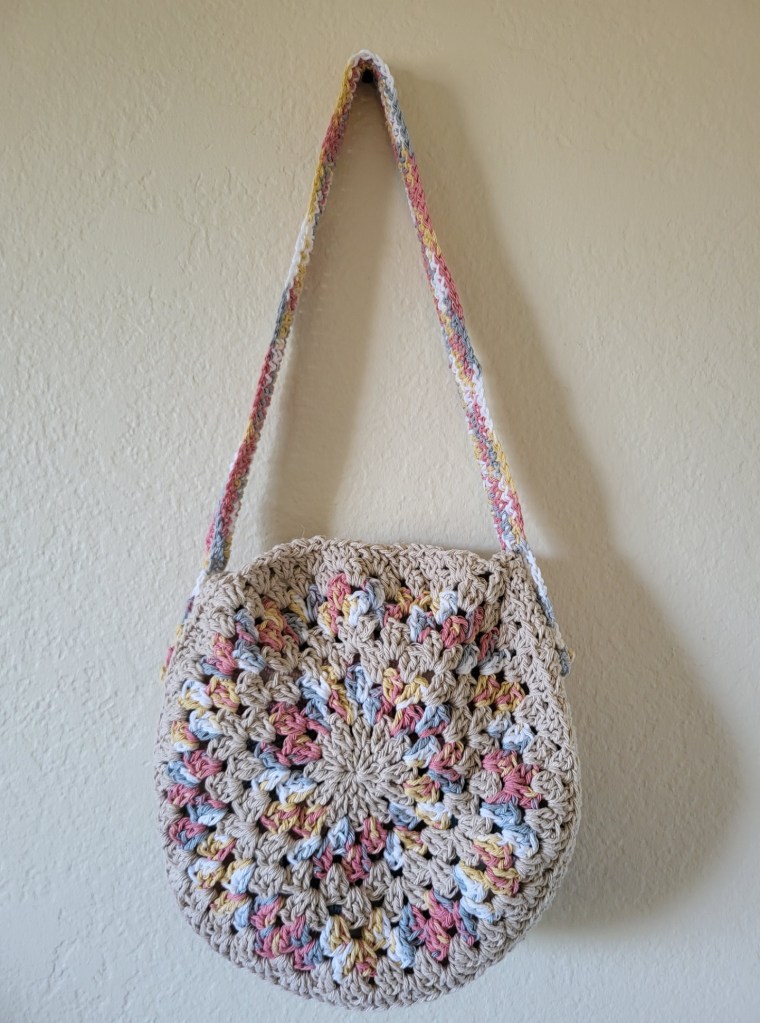
I wanted to use store-bought handles for these bags to really elevate the pieces. There is nothing wrong with making crochet handles though, of course! That was actually my original plan for the medium bucket bag. Perhaps I shall include that on a future version of this pattern? Spoiler alert?

This is my first pattern writing of this caliber where I try to include multiple sizes on one pattern. Feedback is super appreciated!

Pattern

Materials:
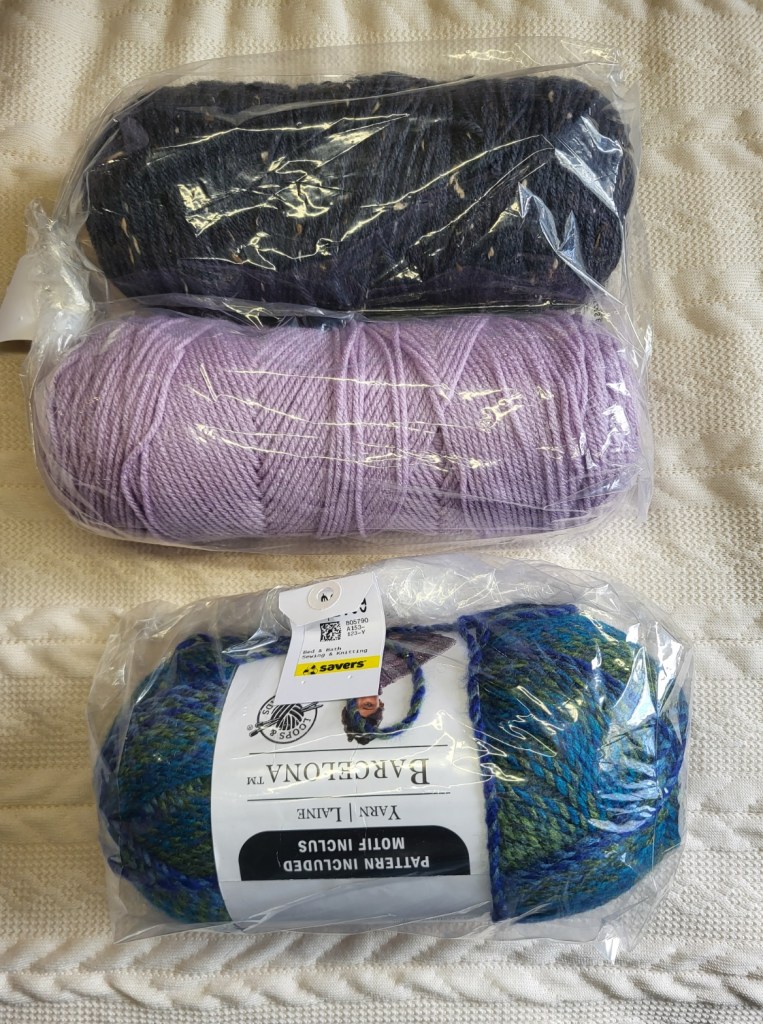
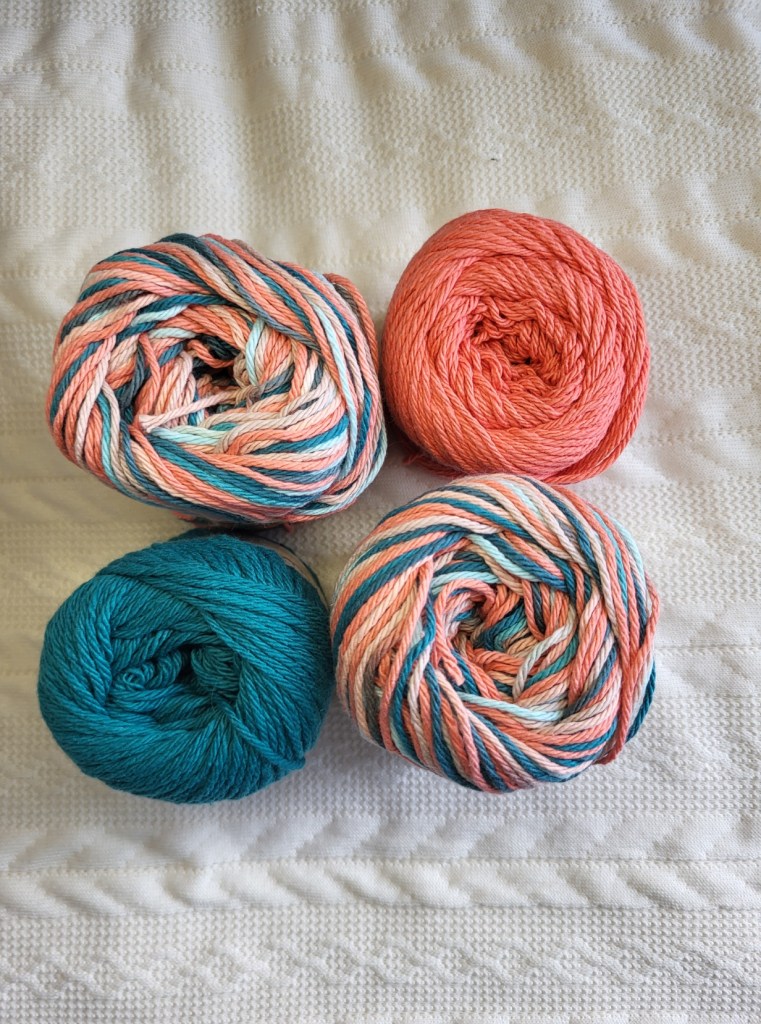
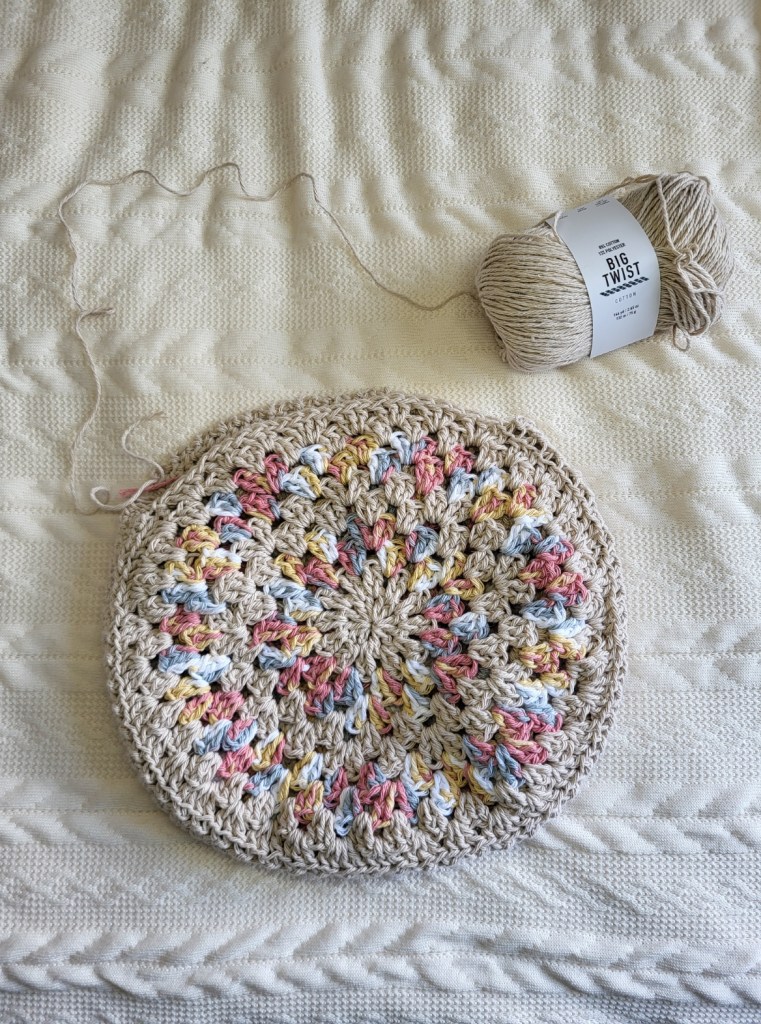
4 skeins of K&C Cotton yarn
6 mm hook
Snap On Handles of your choice
Yarn Scissors
Tapestry Needle

Legend:
ch – chain
sl st – slip stitch
dc – double crochet
sk – skip
sc – single crochet

Notes:
Carry yarns through stitches: where indicated, you will continue the non-working yarn through the working stitches as you go. You will also be carrying the yarn up through the rounds of work. If you choose to cut them as you go, that completely make sense if you don’t want to see the yarn on the inside of your work, but if you don’t mind, it’s easier than weaving in ends 😉

Color change stitch: The color change stitch is created by using a different color yarn to complete the final pull through of a double crochet. This will ensure that the “v” on the top of the stitch is with the new color which makes the color changes look more cohesive.

Instructions:
Small Purse: Ch 29
Medium Bucket Bag: Ch 38
Large Tote: ch 47

For all bags: Round 1: In color A – in 4th ch from hook, 5dc, in back hump: dc in next 25 {33, 43} st until last st, 6dc in last st, then 25 {33, 43} dc across the “V”s. sl st in top of st of ch 3. For small bag move to Round 4
For Medium Bag: Round 2: ch 3, DC in same st, 2 DC in next 5 st, dc in next 33, 2 dc in next 6 stitches, DC in next 33 st, sl st in top of chain 3 stitch to join. Move to Round 4
For Large Bag: Round 3: ch 3, DC in same st, 2 DC in next 11 st, dc in next 43, 2 dc in next 12 stitches, DC in next 43 st, sl st in top of chain 3 stitch to join
All bags: Round 4: Ch 2, 2dc in same st [sk 2, 3DC in next st] rep until 2 st left, sk 2, sl st in 1st cluster to join
Round 5 (carry yarn through stitches): ch 2, DC in same space, DC color change St to color B, {in next sp 2 DC, DC color change St to color A, in next sp 2 DC, DC color change St to color B} Rep til last cluster, 3 DC, SL st to join
Round 6: in color B, ch 2, 2 DC {in next sp 3 DC picking up traveling yarn from previous row} rep til last space 3dc
For small and medium bags: Repeat rounds 5 – 6 (3 more times)
For lage bags move onto Round 7 –
Round 7: (carry yarn through clusters) – ch 2, DC in same space, DC color change St to color C, {in next sp 2 DC, DC color change St to color B, in next sp 2 DC, DC color change St to color C} Rep til end last space, 3dc in space, SL st to join
Round 8: in color C, ch 2, 2 DC {in next sp 3 DC picking up traveling yarn from previous row} rep til end, sl st to join
Repeat Rounds 5 – 8 (3 more times)
Repeat Round 4 in color A
Next Round: ch 2, DC in each st around
Next Round: Ch 1, sc in each st around

For small purse flap:
Row 1: starting in the corner of work, Ch 2, 2dc in same st [sk 2, 3DC in next st]
Row 2: Ch 3, 3 dc in cluster sp, repeat until end, 1 dc in last stitch of previous row
Repeat 1 – 2 once

Iris Cowl Scarf: A Quick Holiday Gift

Looking for a simple and quick crochet gift project? This adorable cowl scarf is quick to work, and makes an adorable handmade gift right in time for the holidays!


As I personally prepare for a move to a colder climate; I find myself thinking about projects to make to stay warm in the winter months. I love making hats, and scarves and gloves. Although, it honestly doesn’t get cold enough in California to wear them all the time! (Or do I just not get out often enough to wear them? This also might be the case!)


I love a good cowl scarf, and I love the length of this one, as I wanted it to wrap around twice. I think the double wrap adds a nice textured look to the accessory! It can easily be made longer, or shorter, depending on how many foundation chains you make. I highly recommend using the foundation chains as you’re making so many chains and combining them at the end, it’s easy to twist the project. The foundation chain stitch gives you a solid, well, foundation, to ensure that the first row is completely flat.

The Iris stitch itself is also so adorable. I love a little flower motif! It would complement so many pieces in my wardrobe. The Hue and Me yarn is has so many beautiful color options as well. Although you can use any bulky weight yarn, I love that the Hue and Me is a mixture of wool and acrylic. It makes projects really soft, and the yarn is easy to work with.

Pattern

Materials:
2 skeins of Hue and Me Bulky Yarn
8 mm hook
Yarn Scissors
Tapestry Needle

Legend:
ch – chain
sl st – slip stitch
dc – double crochet
sk – skip
sc – single crochet

Notes:
Gauge is not too important for project, but if you like a looser scarf, I would make more foundation chains in a multiple of 4

Instructions:
Foundation ch 140, sl st to join
Round 1: Ch 2, DC in ch st, sk 3, [(2dc, ch 1, 2dc} in next st, sk 3] rep until last st, (2dc, ch1) join with sl st
Round 2: ch 3, [in next ch sp: (2dc, ch1, 2dc)] rep until end, 2dc, ch 1, 1dc sl st to in 2nd ch in ch st to join
Round 3 – 7: Repeat round 2
Round 8: Sc around, skipping ch spaces

Midnight Ruffles Floral Cowl

I am such a sucker for these little Daisy floral granny squares! I saw these colors sitting next to each other in my stash, and just KNEW I had to make something. This color purple has been my absolute favorite lately. It’s the grey-toned dark lavender? I absolutely love it! Having colors inspire a project is my favorite way to get inspired.

I’ve always wanted to try “join as you go” for granny squares, but I’ve always been nervous about the gaps. It makes me nervous to have so many pieces held together by mear slip stitches, so I wanted to try something so that the gaps in the fabric wouldn’t matter so much. Although this method is so fun, I may have to risk it for another project!

The flowers on their own are so adorable. The fun part of this project is that it can truly be “make as you go.” As a scrap-buster project, I didn’t have much of the black yarn left, so I was nervous I would be able to make enough flower pieces for the length of the project. I didn’t make this project in stages. The instructions say to make all the flower pieces first, but you don’t have to. I only made a couple flowers at a time and joined them with the purple yarn as I made them to ensure I had enough black yarn. I ended up using almost every inch, which was very satisfying!

The “join as you go” method took a bit to figure out, but the link to the YouTube tutorial I used below, was super clear. I would not recommend, however, working on this project late at night, or after a long day! As shown below, I was super tired and ended up making a bunch of hilarious mistakes. The thing I love most about crochet however is that it doesn’t take too long, so needed to redo a bit isn’t too time-consuming!

Some variations I might suggest: if you’re not into cowl scarves, don’t connect the beginning and the end, and leave it open. To add a bit of flair; I would suggest some tassels or fringe on each end! Also, since you can literally “join as you go”, this scarf can be any length you want. I’d love to see what you make with it! Feel free to tag me on Instagram: @grandmaprints

Pattern

Materials:
Any 3 colors worsted weight yarn
5.5 mm crochet hook
Yarn Needle
Scissors

Legend:
ch: Chain
dc: Double Crochet
sl st: Slip Stitch
tr: Triple Crochet
BLO: Back Loop Only

Notes:
Gauge does not matter for pattern, but I would recommend using about the same weight yarn for each color
Scarf is made lengthwise and joined at the end
Scarf is worked by making each flower individually and then using join as you go method to combine them
For a longer scarf, create more flowers in any even number, you can also literally join as you go to test out the length of the scarf as you’re making it.

Instructions:
“Midnight Ruffles” flowers: Make 20
Round 1: In color 1- Ch 3, in 3rd ch from hook: 12dc, sl st in 1st dc to join & bind off [12st]
Round 2: In color 2- ch 2, 2 dc, sl st ch st to last dc *ch 3, 3 dc, sl st in first st after ch to last dc* rep til end, ch 3, sl st to join & fasten off [12 clusters]
Bind off, weave in ends (seriously, do it now)

Use join as you go to connect the flowers & create the granny square border:
Hooked by Robin has an excellent YouTube video that shows how to join the squares. I highly recommend watching the video and then coming back to this. I will share my variation to make it work with this project:
The only difference is in the corners. You’ll join at any point in the 3ch space of the flower, and begin with half the corner as follows: in ch 3 space: ch 3, 2tr, ch 1.
Moving onto the side of the square: in next ch 3 sp: [3dc, ch 1] repeat “[ ]” in next ch 1 space
Then, you’ll do a full corner: all in ch 3 space: 3 tr, ch 3, 3 tr, ch 1
Repeat each “row” with the double crochet clusters, and each “corner” with the tr clusters.
Otherwise, you’ll follow the join-as-you-go method as shown in the video.

When you get to the end, you’ll need to join the beginning of the scarf to the end
Turn work inside out, so the wrong side is facing you
Work BLO SC stitches along the beginning and end of the work. In chain 1 spaces yarn over each space on each sides of the work to mimic the yarn overs in the join as you go method pattern
Bind off, and weave in ends!

Half Circle Sling Bag

What’s the phrase? “Necessity is the mother of invention”? That phrase has applied so well for my next project. I was looking for a small simple bag to take with me on walks without having to lug around my whole purse. I didn’t really want to buy another item, when I can just buy more yarn instead! Thus, the Half circle sling bag was created.

This time I wanted to try something a little different with my pattern making process. Actually making a mock-up! What! Crazy right? I honestly usually create a little too impulsively, but this time I wanted to make sure I had something that worked and I really liked before jumping right into a project. Obviously, worse case scenario, if it didn’t work out I could just a buy a purse…. but where’s the fun in that?

I’ve always wanted to make something beautiful with the Bernat Maker’s Yarn. I see it in the craft store all the time, and have never had a good idea for a piece. Until now! I never hit add to cart so fast! Especially with this adorable peachy color, I knew that was the perfect yarn for my project. I’ve never worked with it before, and it was super easy and smooth to use. The yarn felt perfect for a beginner project, because the stitches were so easy to see! However, the bad was also that the stitches were easy to see. If an error was made, it seemed a lot harder to hide the stitches in the work, or that a mistake would become hidden by the yarn. It seemed all on display! However, with this simple pattern I was creating, creating beautiful stitches was easy as pie.

Like most of the items I create, I try to make them as customizable as possible. Although I’m now in love with the Maker Yarn, there’s no reason to stick with it! Any yarn will do really, although for the life of your item, I would try to stick to a sturdy somewhat thicker weight yarn, just to make sure your project lasts! The first one I made in a basic worsted acrylic, although cute, doesn’t feel like it would last in the elements as say a cotton weight yarn might! Use your discretion! Also feel free to create as many (or as little) half rows as you would like to determine the size of your bag. It’s all up to you! Have fun with it!

Pattern

Materials:
One skein Bernat Maker yarn
Size 6mm crochet hook
Two D-Rings 1.5 inch
One adjustable buckle slides 1.5 inch
yarn needle
scissors
Optional: Pre-made purse strap

Legend:
ch – chain
sc – single crochet
dc – double crochet
sl st – slip stitch

Notes:
turning chain counts as first stitch

Instructions:

Body of purse – make two:
ch 3
Row 1: in 1st ch, 5dc, ch 2, turn (6)
Row 2: dc in ch st, 2dc in each st across, ch 2, turn (12)
Row 3: dc in ch st, 1dc in next st, {2dc in next st, 1dc in next st} repeat until end, ch 2, turn (18)
Row 4: dc in ch st, 1dc in next 2 sts, {2dc in next st, 1dc in next 2 sts} repeat until end, ch 2, turn (24)
Row 5: dc in ch st, 1dc in next 3 sts, {2dc in next st, 1dc in next 3 sts} repeat until end, ch 2, turn (30)
Row 6: dc in ch st, 1dc in next 4 sts, {2dc in next st, 1dc in next 4 sts} repeat until end, ch 2, turn (36)
Row 7: dc in ch st, 1dc in next 5 sts, {2dc in next st, 1dc in next 5 sts} repeat until end, ch 2, turn (42)
Row 8: dc in ch st, 1dc in next 6 sts, {2dc in next st, 1dc in next 6 sts} repeat until end, ch 2, turn (48)
Row 9: dc in ch st, 1dc in next 7 sts, {2dc in next st, 1dc in next 7 sts} repeat until end, ch 2, turn (54)
Row 10: dc in ch st, 1dc in next 8 sts, {2dc in next st, 1dc in next 8 sts} repeat until end, ch 2, turn (60)
Row 11: dc in ch st, 1dc in next 9 sts, {2dc in next st, 1dc in next 9 sts} repeat until end, ch 2, turn (66)
Row 12: dc in ch st, 1dc in next 10 sts, {2dc in next st, 1dc in next 10 sts} repeat until end, ch 2, turn (72)
Row 13: dc in ch st, 1dc in next 11 sts, {2dc in next st, 1dc in next 11 sts} repeat until end, ch 2, turn (78)

Joining the pieces together:
attach yarn at the beginning of the half circle
Row 1: ch 12, sl st to other half circle to join. ch 1, turn
Row 2: sc across, sl st in next 2 stitches on half circle body piece, ch 1 turn
Row 3: skip 2 sl st, sc across, sl st in next 2 st on half bottle piece, ch 1 turn
Repeat Row 3 until completely joined end at opposite side, bind off.

Attaching D-Rings
Fold the two body pieces so they meet, see below picture:
SC 8 stitches evenly through all layers.
Create 8 more rows of SC
Fold in D-Ring, matching 8th row of sc to the first, and sew together with excess yarn.
Repeat on other side

Strap:
ch 6,
Row 1: DC 6 across, ch 2, turn
Repeat until desired length.

For adjustable buckle:
fold middle piece of buckle to the end of strap and secure with excess yarn.
Feed through one D-Ring attached to body, and then feed end through Adjustable buckle.
Attach other end to other D- Ring.

You can also purchase a separate purse strap with clips so you can change it out as desired.

If you’re looking for a more secure strap, check out my tutorial: One Way Stretch Crochet Strap

Lay Flat Drawstring Pouch

What’s that quote? “Necessity is the mother of Invention?” I’m lucky to have friends who love to give each other gifts in reusable bags. I needed something for a gift, and I’ve always wanted to make a drawstring pouch. I’ve seen the lay flat bags online a bunch already, and I knew I had to make one!

I had some leftover Dishie yarn from a previous project, and I thought it would be a perfect way to use up the leftovers! I love the soft cotton yarn of the dishie, and despite the name, it can be used for more than just dishcloths! I love this yarn especially because it’s softer than other cotton yarns when it works up it will maintain its shape without being bulky.

While in the process of making this pouch, I realized there are so many other uses for it. Obviously it can be used to hold gifts, but you can also use it as a makeup holder and mat. You could use it to hold other small items as well. And for the nerdy inclined, of course, it’s a dice holder and will second as a playing mat!

The possibilities of this bag are endless, not in terms of what to hold in the bag, but you can make the circle as large or as small as you would like. If you have more makeup (or more dice) you can make a larger bag to hold more stuff, and to have a larger space to lay everything out in. A smaller bag would also work great to keep in a purse or tote!

Construction of the bag is super easy, as it’s just a flat circle. It’s also super customizable as you can use any variety of different yarn colors or types. It would also look super awesome with a different type of drawstring. Either a leather piece for a more refined look; or if you’re looking for something more utilitarian, a shoestring!

Pattern:

Materials:
3 Skeins of Knit Picks Dishy Cotton yarn
Size 4mm crochet hook
Yarn Scissors
Tapestry needle

Legend:
Ch – Chain
st – Stitch
DC – Double Crochet
sl st – slip stitch

Instructions:
Ch 3
Round 1: In 1st st, 11 dc, sl st to join (12)
Round 2: Ch 2, DC in ch st, 2 dc in each st around, sl st to join (24)
Round 3: Ch 2, DC in ch st, {1 DC in next st, 2 DC, in next st} Repeat {} until last st, DC, sl st to join (36)
Round 4: Ch 2, DC in ch st, {2 DC in next 2 st, 2 DC, in next st} Repeat {} until last st, DC, sl st to join (48)
Round 5: Ch 2, DC in ch st, {3 DC in next 3 st, 2 DC, in next st} Repeat {} until last st, DC, sl st to join (60)
Round 6: Ch 2, DC in ch st, {4 DC in next 4 st, 2 DC, in next st} Repeat {} until last st, DC, sl st to join (72)
Round 7: Ch 2, DC in ch st, {5 DC in next 5 st, 2 DC, in next st} Repeat {} until last st, DC, sl st to join (84)

Continue adding 1 additional stitch between each “2 DC” stitches, which will create 12 additional stitches each round. Plug in your additional number for each “#” spot
Round 8 – ?: Ch 2, DC in ch st, {# DC in next # st, 2 DC, in next st} Repeat {} until last st, DC, sl st to join (increase by 12 each round)

Keep increasing rounds until you’ve reached your desired circumference.

You can change colors at any beginning of a round, creating a pattern you love!

Drawstring Row: On an even number of increases row: ch 3, {sk st, 1DC in next st, ch 1} repeat {} until end, sl st to join.
Next Row: Ch 2, 1 DC in each st around.

Create a drawstring using chains or an icord, whichever method you prefer! Weave the cord in and out of every 3rd space, and pull tight! Finish with a bow to hold closed. You can also tie together the two ends to make sure it doesn’t come apart from the lay-flat pouch.

Granny Square Ear Warmers

I realize I have it easy in California right now, but I know, it’s cold out there! Hopefully you’re keeping warm, but if not i’m also hoping that this easy scrap buster ear warmer project will keep you warmer!

This project looks so cute when it’s done, but I will admit, making and combining all these granny squares took longer than I orginally anticipated! It may have been because I got distracted trying to make sure that I evenly spread all the colors of yarn I had throughout. However, if you’re less worried about using yarn evenly, or matching colors, it would work up super quick! 

The indivual squares are absolutely adorable! Which is great, because you will need about 20 of them. I recently got a blocking board for christmas! However, only after I had already completed this project. If you feel like it, you can definately block all the squares once they’re made, and now that I’ve tried blocking, I highly recommend it! It was like when I finally started ironing my seams years after I began sewing. hehe oops! Having a perfectly square granny square is SO satisfying. 

After way too long that I would like to admit, I finally made my 20 squares. As I mentioned before, the most time consuming part of the project was deciding where they all go! I wanted it too look random, and not have any of the colors touch each other too much. After I laid them all out I combined the squares with a single crochet. 

My favorite way to combine granny squares is using a single crochet with the back posts of the stitches. I like this way because it leaves the front stitches visible and keeps the edging look of the stitch. It looks similar to simply sewing the squares together, but it gives it a little more stretch than it would if you just stitched them.

To the eagle eye’d follower of my blog, this part of the pattern may seem very familiar! I have absolutely featured it before another project of mine, linked here. I think the twisty headband/ear warmer look is super cute, and while the project still looks handmade, it adds a touch of luxury and “store-bought-ness” (a phrase I just made up) to the piece.

Here’s another colorway I did while making these. I think they’re super cute and easy and I hope you’re able to make your own as well! Share your version in the comments!

Pattern:

Materials:
4 skeins of worsted weight yarn, different colors, or scraps
Size 5.5mm crochet hook
Yarn scissors
Tapestry needle

Legend:
Ch – Chain
Dc – Double Crochet
Blo – Back Loop Only

Granny Squares (make 20)
Ch 4
Round 1: In 4th ch from hook [2dc, ch 2, *3 dc, ch 2* repeat twice more] sl st to join
Round 2: attach new color: ch 3 in any corner sp, in sp: [2dc, ch 2, 3dc, ch 2], in next 3 corner spaces: [3dc, ch 2, 3dc, ch 2] sl st to join.

Combining the Squares:
Join squares with sc blo, I made sets of 2 and combined those sets together. It might be easier to make 2 long chains of ten and then combine those two like the pictures above. Up to you!

To finish the headband to make the twist:
1. Fold right sides together, in half lengthwise.
2. Fold in half again so the two long sides meet. The two U shaped corners will interlock with each other to form the twist when you flip it right side out.
3. Sew through all 4 layers and secure ends.

Thifting Second Hand Craft Supplies

I am lucky enough (or maybe not?) to have a big box craft store in the same shopping center as a thrift store where I live. I am lucky because it gives me a one-stop shop when I’m shopping for a new project, but sometimes I can also end up spending way too much money. Sometimes I can go out and only get only what I need and head home. Other times it’s extremely difficult to not get distracted by all the beautiful clothes and trinkets offered at a lesser price than buying new. Obviously, it can be difficult to find a decent second-hand item, but it’s the thrill of the hunt, right?

I want to take the time to really explore what it means to buy second-hand and especially focus on second-hand craft supplies. Back to my lucky shopping center: I’m not sure if it’s because it’s so close to a craft store, or what the reason is, but the thrift store more often than not has craft options! I live in a highly populated area, so there are a lot of thrift stores nearby, but I’m realizing not a lot of them offer craft supplies. Whenever I visit, I check out the blanket and curtain area for by-the-yard fabric, usually, there are 2-3 yard pieces offered for $2-$3 for the whole piece! I usually see ribbons and other notions offered in small bags grouped together by type or color also for fairly cheap! And of course, my favorite, YARN!

On a recent trip, there was a whole section of a wall that had yarn in little bags. (Did someone donate their whole stash?) But they had some beautiful offerings, and I couldn’t help but take a few home! As you can see in the picture above, I purchased two bags. One had two unlabeled skeins, and the second one I was glad still had the information about the yarn attached! I believe the dark blue is a tweed yarn (by the bits of fluff throughout) most likely the Joanns Value Tweed. For the lavender color, I had a hard time deciding between Joann’s value yarn, or possibly a Red Heart value yarn. It seemed too soft to be the Red Heart when I was working with it, but also too rough for Joann’s value yarn. I work with Joann’s one a lot and it’s honestly super soft and nice. So I really hard time deciding on that one. Either way, I’m pretty sure it’s a basic acrylic.

Is there any downside to thrifting yarn?

Obviously, there are downsides to thrifting in general. Whether it be thrifting clothes or home goods some items can have obvious and sometimes extreme signs of wear. Items can be torn, or seem worn out, and then there’s the unfortunate *mystery stains*. EEK! I used to be a pretty avid second-hand clothes shopper online and even though my favorite place would take pictures of the items and try to describe them as best as possible I would still receive items that were ripped, missing buttons, or just plain the wrong size for me. However, this is from a corporate online thrift business, not one that has individuals posting their own clothes. (I’ve had good luck with those actually, but that’s a whole other blog post!)

At any rate, with specifically yarn or other crafts, or even by the yard fabric, you can still find some items dirty, worn, or also unfortunately stained. In the case of the items I purchased, there’s still a risk of having the whole yardage available. Who knows if they used a bit of the yarn and then donated the rest. Luckily the skeins were pretty intact, but if you work with yarn at all (which I assume you do) it’s really easy to get it all knotted up! Luckily these were placed in bags so it would be difficult to get them dirty at least in the store, but who knows how they were kept or stored, I lucked out with these items, and they seem to be in pretty good condition.

Then there’s the fiber issue. A lot of crafters would prefer to work with only natural fibers or are against working with animal fibers. I’m sure there’s a way to tell what kind of fibers the skeins are, but for me, or other somewhat novices when it comes to fiber content, I have no idea how to do that by look or feel! Also, since they bagged two skeins in one package that were mismatched, I found myself turning down a lot of the options that had one skein I really loved, and another that would probably just wind up back at the thrift store! And for a girly on a tight budget like me, that isn’t really an option.

All in all, I believe the pros outweigh the cons. I was able to get a few products I really loved, at a fraction of the cost that I would have paid for these items new! I do have to be careful when using these yarns to make sure I have the correct yardage for any project I’m working on, but I’m glad to keep these items out of a landfill, and give them a new life with a beautiful project! Do you have a favorite thrift store near you that offers craft supplies? Let me know in the comments below!

Dragon Scale Epaulets Crochet Armor

Renaissance Faire season is coming up my friends! I get super excited every year and want to buy a new outfit. However, now that I’ve been going there for several years, I have so many outfits. My friends and I have dressed as our numerous d&d characters over the years, and so many other fighter, royal, and pirate-inspired outfits! I’ve had this idea in my mind for a while now, and I finally had the inspiration to bring it to life!

I’ve always wanted dragon-scale epaulets and I’ve spent years researching the best way to make them. My first thought was to buy a bunch of those metal (aluminum?) ones from a craft store, but they are EXPENSIVE! Especially since I would need 100s of the scales to get the effect I was looking for. I’ve seen the crocodile stitch for a while, but I always thought it was going to be super difficult to make. Turns out, it’s way easier than I thought! Once I got a hang of the individual scales, I was immediately inspired to make the epaulets I had been dreaming of.

Now that the epaulets have been made I knew I wanted to attach it to something. I had been struggling with myself to figure out exactly what. I honestly think it would look just as good with some kind of chain holding them together, but I wanted to see what it would look like on some kind of breastplate-inspired look.

The light grey “breastplate” does kind of seem more like a poncho to me, but I still think it’s cute. The front post/back post ribbing looks amazing with the armor feel to me. The poncho itself is very customizable for sizing. I’ve only included in this free pattern the sizing that works best for me, which is typically medium or large. I can’t decide the best way to increase the length of the poncho, but you can either repeat more rows of each pattern or repeat the whole pattern completely.

Here’s an adventuring-inspired look! This poncho is crocheted in the round, but I began each row on the shoulder portion to keep a smooth look on both the back and the front. I had also thought to add a collar, I haven’t decided the best way to do that, but feel free to create your own and post it in the comments!

Finally, I have the D&D-inspired look, and I’m able to show off the many, MANY, dice I have collected over the years. (I don’t have a problem). I hope you’re inspired to make this, or make something similar based on this pattern. I might use a different type of yarn than the one I used. I was so excited to create it, but I didn’t think about wearing this in the late summer California heat… a cotton or bamboo yarn might work better.

Pattern

Materials:
2 skeins Caron Simply Soft in Feathered Gray
1 skein Clisil Metallic Yarn in Light Gray
Size 5mm Crochet Hook
Size 3mm Crochet Hook
Yarn Scissors
Tapestry Needle

Legend:
ch – chain
st – stitch
sk – skip
rep – repeat
sl st – slip stitch
dc – double crochet
hdc – half double crochet
blo – back loop only
fpdc – front post double crochet
bpdc – back post double crochet

Instructions:

Epauletes:
Use Metallic Yarn
Use 3mm crochet hook

ch 4
Row 1: dc in 4th ch from hook
Row 2: ch 3, 4dc around dc post, ch 1, 5dc around dc post {1 scale}
Row 3: ch 3, dc in same st, ch 2, 2dc in middle of scale, 2dc in 3ch st of previous row
Row 4: ch 3, 4dc around dc post, ch 1, 5dc around dc post, ch 1, sk 2ch spc & 2dc & 2ch sp, 5dc around dc post, ch 1, 5dc around dc post {2 scales}
Row 5: ch 3, dc in same st, ch 2, 2dc in middle of scale, ch 2, 2dc on ch sp between 2 scales, and through middle of 2dc of previous row, ch 2, 2dc in middle of scale, ch 2, 2 dc in ch 3 st of previous row
Row 6: ch 3, 4dc around dc post, ch 1, 5dc around dc post, [ch 1, sk 2ch spc & 2dc & 2ch sp, 5dc around dc post, ch 1, 5dc around dc post] repeat. {3 scales}
Row 7: ch 3, dc in same st, [ch 2, 2dc in middle of scale, ch 2, 2dc on ch sp between 2 scales, and through middle of 2dc of previous row] repeat, ch 2, 2dc in middle of scale, ch 2, 2 dc in ch 3 st of previous row
Row 8: ch 3, 4dc around dc post, ch 1, 5dc around dc post, [ch 1, sk 2ch spc & 2dc & 2ch sp, 5dc around dc post, ch 1, 5dc around dc post] rep twice. {4 scales}
Row 9: ch 3, dc in same st, [ch 2, 2dc in middle of scale, ch 2, 2dc on ch sp between 2 scales, and through middle of 2dc of previous row] repeat twice, ch 2, 2dc in middle of scale, ch 2, 2 dc in ch 3 st of previous row
Row 10: ch 3, 4dc around dc post, ch 1, 5dc around dc post, [ch 1, sk 2ch spc & 2dc & 2ch sp, 5dc around dc post, ch 1, 5dc around dc post] rep 3 times. {5 scales}
Row 11: ch 3, dc in same st, [ch 2, 2dc in middle of scale, ch 2, 2dc on ch sp between 2 scales, and through middle of 2dc of previous row] repeat three times, ch 2, 2dc in middle of scale, ch 2, 2 dc in ch 3 st of previous row
Row 12: ch 3, 4dc around dc post, ch 1, 5dc around dc post, [ch 1, sk 2ch spc & 2dc & 2ch sp, 5dc around dc post, ch 1, 5dc around dc post] rep 4 times. {6 scales}

At this point, you can continue to repeat rows until it reaches your desired width. End on a even number of scales. The next rows will increase the length but not the width, alternating between number of scales for each row.

Row 13: ch 3, 1 dc in middle of scale, ch 2, 2dc on ch sp between 2 scales, and through middle of 2dc of previous row [ch 2, 2dc in middle of scale, ch 2, 2dc on ch sp between 2 scales, and through middle of 2dc of previous row] repeat 3 times, ch 2, 2dc on ch sp between 2 scales, and through middle of 2dc of previous row
Row 14: ch 1, sk 2 dc posts and sk 2 ch, 5dc around dc post, ch 1, 5dc around dc post, [ch 1, sk 2ch spc & 2dc & 2ch sp, 5dc around dc post, ch 1, 5dc around dc post] repeat 3 times. sl st to 3ch space of previous row. {5 scales}
Row 15: ch 3, dc in 3ch sp of previous row, [ch 2, 2dc in middle of scale, ch 2, 2dc on ch sp between 2 scales, and through middle of 2dc of previous row] repeat 3 times, ch 2, 2dc in middle of scale, ch 2, 2dc in ch sp & through middle of 2dc of previous row.
Row 16: same as Row 12
Repeat rows 13 – 16 5 times, or until desired length, ending in a Row 16 repeat.
Last Row: [ch 2, 2sc in middle of scale, ch 2, 2sc on ch sp between 2 scales, and through middle of 2dc of previous row] repeat until end, ch 2, 2 sc in middle of scale.
Tie off.

Poncho:
Use Caron Simply Soft
Use 5.5 mm Crochet Hook

ch 96, join as circle
Round 1: ch 2, hdc in each st in 24th ch: 2hdc, ch 2, 2hdc, hdc in next 48 st, in 72nd st: 2hdc, ch 2, 2hdc, hdc in rest of stitches, sl st to join
Round 2: ch 2, [hdc in next st, ch 1, hdc in same st, sk st] rep until ch 2 sp, in ch 2 sp: hdc, ch 1, hdc, ch 2, hdc, ch 1, hdc, [hdc in next st, ch 1, hdc in same st, sk st] rep until ch 2 sp, in ch 2 sp: hdc, ch 1, hdc, ch 2, hdc, ch 1, hdc, [hdc in next st, ch 1, hdc in same st, sk st] rep til end, sl st to join
Round 3: ch 2, [in ch space of previous row: hdc, ch 1, hdc] rep til ch 2 sp, in ch 2 sp: hdc, ch 1, hdc, ch 2, hdc, ch 1, hdc, [in ch space of previous row: hdc, ch 1, hdc] rep til ch 2 sp, in ch 2 sp: hdc, ch 1, hdc, ch 2, hdc, ch 1, hdc, [in ch space of previous row: hdc, ch 1, hdc] rep til end, sl st to join
Round 4 – 5: Repeat Round 3
Round 6: ch 3, [dc in each hdc st, skipping ch 1 spaces, repeat until ch 2 sp, in ch 2 sp: 2dc, ch 2, 2 dc] repeat once, sl st to join
Round 7: ch 3, [dc in each st until ch 2 sp, in ch 2 sp: 2dc, ch 2, 2 dc] repeat once, sl st to join
Round 8 – 10: Repeat round 7
Round 11: Ch 3, [1dc ch 1, sk 1 st] repeat until ch 2 space, in chain 2 space: 2 dc, ch 2, 2dc, [1dc ch 1, sk 1 st] repeat until ch 2 space: in chain 2 space: 2 dc, ch 2, 2dc, [1dc ch 1, sk 1 st] repeat until end, sl st to join
Round 12: Ch 2, hdc in each st & ch space until ch 2 space, in ch 2 space: 2dc, ch 2, 2 dc, hdc in each st & ch space until ch 2 space, in ch 2 space: 2dc, ch 2, 2 dc, hdc in each st & ch space, sl st to join
Round 13: Repeat Round 2
Round 14: Repeat Round 3
Round 15: Repeat Round 6
Round 16 – 17: Repeat Round 7
Round 18: ch 3, [dc blo in each st until ch 2 sp, in ch 2 sp: 2dc, ch 2, 2 dc] repeat once, sl st to join
Round 19: ch 3, [fpdc, bpdc in each alternating st until ch 2 sp: 2dc, ch 2, 2dc] repeat once, sl st to join
Round 20: ch 3, [bpdc, fpdc in each alternating st until ch 2 sp: 2dc, ch 2, 2dc] repeat once, sl st to join
Round 21: Repeat Round 19
Round 22: Repeat Round 20
Round 23: [sl st in each st until ch 2 sp, 2 sl st in space] repeat once, bind off

Sew Epaulets to shoulder seams on the poncho.

Granny Square Pocket Backpack

When I think of Summer, I think of going to the beach, pool parties, and backyard BBQs. You need a bag that will get you through all of that. I found these colors of Sugar and Spice cotton yarn on Amazon as a pack! It was super convenient because sometimes I have a really hard time color matching, especially online. Even in stores, sometimes the fluorescent lights can alter the colors when you get them into the daylight. These colors definitely make me feel like I’m beach ready with all the things I will need for my beach day.

The drawstring-style backpack really takes me back to my roots. I’m not sure if everyone was forced to make a drawstring backpack like this as a first project in sewing class, or if it was just my middle school. (Do they even have home ec or sewing classes anymore?) But it’s a classic because it works! It’s super easy and it makes a super comfortable backpack.

I absolutely love the idea of the granny squares that make pockets. I feel like so many yarn craft projects skip out on the pockets, and they’re totally necessary since it’s so hard to find them on pants! (am I right?) (It’s getting better though!) I feel like it adds a bit of uniqueness to this piece which is otherwise a fairly run-of-the-mill crochet backpack. I used single crochet for the body of the back to really create a sturdy fabric for the piece. The cotton yarn also helped give the impression of sturdiness. I’m hoping this bag will last way past the summer months, and into many seasons to come.

Speaking of the yarn, look at that color pooling! Honestly, when I pictured how I wanted this bag to look, it was WAY different than it turned out. I had no idea the yarn would pool like that, I had more of a speckly pattern envisioned in my head, although I’m not disappointed! It really juxtaposes the color variety of the granny squares to give the bag a unique look. Does it kind of remind you of that ’90s paper cup pattern? (Aging myself again? 😅 That’s okay.)

As always I hope this bag inspires you to make your own creations with the free pattern listed below. I’m curious to see what the bag would look like with solid colors, or using the variegated yarn in different areas of the bag. I’m even curious to see what it might look like with different drawstrings. I picked this twill tape because it was cheap and easy, also the smoothness of the tape allows it to open and close easily. I might stay away from a crocheted strap like an icord or something (which was my original idea) as it would get stuck on the triple crochet yarn row made for the drawstring. Let me know what you think up!

Pattern:

Materials:
4 skeins of Sugar and Cream Cotton Yarn
2 different solid colors
2 variegated colors
crochet hook size I or 5.5mm
tapestry needle
yarn scissors
5 yards of twill tape
sewing thread
sewing needle
fray check or clear nail polish

Color A: Light Solid or “Tangerine”
Color B: Dark Solid or “Teal”
Color C: Variegated Color or “Coral Seas”

Legend:
ch – chain
dc – double crochet
st – stitch
rep – repeat
sp – space
sl st – slip stitch
flo – front loop only
tr – treble crochet (aka triple crochet)

Instructions:

Granny Squares: (Make 2)
In Color B: Ch 3, 2dc in 1st ch, [ch 2, 3 dc in 1st st] rep 3 times
In Color A: Insert in any ch 2 sp, and work in ch 2 spaces: ch 2, 2 dc, ch 2, 3 dc, ch 1, in next ch sp: [3 dc, ch 2, 3dc, ch 1] rep 2 times, sl st to first st to join
In Color B: Insert in any ch 2 sp, In ch 2 space: ch 2, 2dc, ch 2, 3 dc, ch 1, [in ch 1 space: 3dc, ch 1, in ch 2 space: 3dc, ch 2, 3 dc, ch 1] repeat 2 times, sl st to 1st st to join
In Color A: Insert in any ch 2 sp, In ch 2 space: ch 2, 2dc, ch 2, 3 dc, ch 1, [in ch 1 space: 3dc, ch 1, in ch 1 space: 3dc, ch 1, in ch 2 space: 3dc, ch 2, 3 dc, ch 1] repeat 2 times, sl st to 1st st to join
In Color B: Insert in any ch 2 sp, In ch 2 space: ch 2, 2dc, ch 2, 3 dc, ch 1, [in ch 1 space: 3dc, ch 1, in ch 1 space: 3dc, ch 1, in ch 1 space: 3dc, ch 1, in ch 2 space: 3dc, ch 2, 3 dc, ch 1] repeat 2 times, sl st to 1st st to join

Granny Squares: (Make 2)
In Color A: Ch 3, 2dc in 1st ch, [ch 2, 3 dc in 1st st] rep 3 times
In Color B: Insert in any ch 2 sp, and work in ch 2 spaces: ch 2, 2 dc, ch 2, 3 dc, ch 1, in next ch sp: [3 dc, ch 2, 3dc, ch 1] rep 2 times, sl st to first st to join
In Color C: Insert in any ch 2 sp, In ch 2 space: ch 2, 2dc, ch 2, 3 dc, ch 1, [in ch 1 space: 3dc, ch 1, in ch 2 space: 3dc, ch 2, 3 dc, ch 1] repeat 2 times, sl st to 1st st to join
In Color C: Insert in any ch 2 sp, In ch 2 space: ch 2, 2dc, ch 2, 3 dc, ch 1, [in ch 1 space: 3dc, ch 1, in ch 1 space: 3dc, ch 1, in ch 2 space: 3dc, ch 2, 3 dc, ch 1] repeat 2 times, sl st to 1st st to join
In Color A: Insert in any ch 2 sp, In ch 2 space: ch 2, 2dc, ch 2, 3 dc, ch 1, [in ch 1 space: 3dc, ch 1, in ch 1 space: 3dc, ch 1, in ch 1 space: 3dc, ch 1, in ch 2 space: 3dc, ch 2, 3 dc, ch 1] repeat 2 times, sl st to 1st st to join

Join Granny Squares:
sc join together each side of the granny squares to form a tube

Base of Backpack:
In color A:
magic circle, ch 2, sc 6 (for foundation of 7)
Round 1: Ch 2, sc 6 (for foundation round of 7), sl st to join {7}
Round 2: Ch 2, sc in same ch st, 2sc in each st around, sl st to join {14}
Round 3: Ch 2, sc in same ch st, [1 sc, 2sc in next st] 5 times, sc 1, sl st to join {21}
Round 4: Ch 2, sc in same ch st, [2 sc, 2sc in next st] 5 times, sc 2, sl st to join {28}
Round 5: Ch 2, sc in same ch st, [3 sc, 2sc in next st] 5 times, sc 3, sl st to join {35}
Round 6: Ch 2, sc in same ch st, [4 sc, 2sc in next st] 5 times, sc 4, sl st to join {42}
Round 7: Ch 2, sc in same ch st, [5 sc, 2sc in next st] 5 times, sc 5, sl st to join {49}
Round 8: Ch 2, sc in same ch st, [6 sc, 2sc in next st] 5 times, sc 6, sl st to join {56}
Round 9: Ch 2, sc in same ch st, [7 sc, 2sc in next st] 5 times, sc 7, sl st to join {63}
Round 10: Ch 2, sc in same ch st, [8 sc, 2sc in next st] 5 times, sc 8, sl st to join {70}
Round 11: Ch 2, sc in same ch st, [9 sc, 2sc in next st] 5 times, sc 9, sl st to join {77}
Round 12: Ch 2, sc in same ch st, [10 sc, 2sc in next st] 5 times, sc 10, sl st to join {84}

Connecting Base of Backpack to Granny Square Tube:
join granny square tube to base, right sides together
sc flo join in each st around
leaving right sides together, continue to sc in rounds into base circle using color C until desired length or “40” rounds
It should look like this:

Create Space for Strap:
change to color B, tr in all st around

Create top of bag:
switch back to color C, sc in all st’s for 3 more rounds.

Sewing pockets:
Using yarn and a tapestry needle, use a running stitch to sew the single crochet rows that are used to connect the granny squares to the body of the backpack, this creates the pockets.

To make Straps:
Cut twill tape in half
apply fray check or clear nail polish to the ends of the twill tape, and let dry.
beginning at the side; weave twill tape in and out of treble crochet opening every 4 stitches until you meet the beginning
on the other side of the project, do the same weaving twill tape in and out of the same 4 stitches.
Pull straps so that it’s even on both ends.
with a sewing needle and thread, sew the ends of both straps together and then sew behind the middle granny square cluster on the bottom of the bag
repeat on the other side

Granny Circle Purse

Honestly, something I’ve always wanted to make is a crochet circular purse. And what better to make it out of none other than my new favorite yarn! We’re back with the Big Twist Cotton Blend in Wildflowers and Sand. Even just the names of the colors conjure up this image of taking your favorite book to the beach and relaxing by some nearby wildflowers. The vibes even of the thought of this purse are immaculate!

I didn’t even want this purse to be that large. It’s a one-trip bag for sure; a trip to brunch, window shopping at your favorite store, or visiting a friend! The strap isn’t even too long to make sure that it stays close to you and is easy to carry on your shoulder or arm. I used my favorite method to make the strap featured in a previous post of mine, which you can check out here.

The most fun part of making this bag (at least for me) wasn’t even making the granny circles, it was combining the two bags! I love the front loop/back loop only crochet stitches to really feature the way the granny clusters look. This part of the bag you crochet all the way around to maintain a bit of structure to the circular part of the bag, but still includes a sizeable opening to keep all your stuff safe.

Even though it’s a smaller bag, it still can hold a lot of stuff! Hopefully, at least, all the essentials. When I decide to make another one, (because it’s so cute I need two at least!) I really think it would benefit from a button and loop closure on the top for added cuteness. A lining would really up the ante on this bag as well! Maybe one could even be featured in a later blog post. Despite how much I love my crochet handles, I think it would really add a bit of luxury for a leather or other store-bought handle and some purse notions.

The possibilities are always endless! I hope you use this pattern as a guideline, and use it to inspire you to put a bit of your own style in every project!

Pattern

Materials:
1 skein Big twist cotton in Multi Wildflowers
2 skein Big Twist cotton in Sand
5.0 mm “H” crochet hook
yarn scissors
tapestry needle

Legend:
ch – chain
dc – double crochet
st – stitch
sk – skip
sl st – slip stitch
spc – space
blo – back loop only
flo – front loop only

Notes:
“cluster” refers to the 4 double crochet stitches all stitched in same space of previous row

Instructions:
Magic Circle
Round 1: Ch 3, 11 dc, sl st to join
Round 2: Ch 3, 1dc in same sp, 2 dc in each spc, rep to end, slip st to join
Round 3: Change colors, Ch 3, 2dc in same spc, 3 dc in each spc rep til end, slip st to join
Round 4: ch 3, 3dc in same spc, [3dc in next spc, 4 dc in next spc] rep til last spc, 3dc in next spc, sl st to join
Round 5: change colors, ch 3, 2dc in same sp, [3dc in spc in middle of 4dc cluster, 3 dc in next 2 spcs] rep til last 4 dc cluster, 3dc in spc in middle of 4dc cluster, 3dc in next spc, sl st to join.
Round 6: Same as round 4
Round 7: Same as round 5
Round 8: ch 3, 3 dc in same spc, [3 dc in next 2 spaces, 4 dc in next spc] rep til last two spcs, 3 dc in each, sl st to join.
Round 9: change colors, ch 3, 2 dc in same sp, [3dc in next 3 spc, 3dc in middle of 4dc cluster] rep til last two spcs, 3 dc in each, sl st to join.
Round 10: ch 3, 3 dc in same sp, [3 dc in next 3 spaces, 4 dc in next spc] rep til last two spcs, 3 dc in each, sl st to join.

make two

to join circles:
Row 1: join yarn to any stitch on outer circle, ch 8, sl st to st on other circle.
Row 2: 8 sc, 2 sl st blo, turn
Row 3: sk 2 sl st, 8 sc, 2 sl st flo, turn
Row 4: sk 2 sl st, 8 sc, 2 sl st blo, turn
Row 5: Repeat row 3
Row 6: Repeat row 4
continue for 92 total rows or until 24 stitches left
row 92: 4 sc, ch 2 turn
row 93: 4 sc, 2 sl st flo, turn
row 94: sk 2 sl st, 4 sc, ch 2, turn
row 95: rep row 2
Row 96: rep row 3
Row 111: 4 sc, 1 sl st flo, turn
Row 112: fold so right facing (out sides of bag) are facing each other, make sure stitches are lined up with Row 1, sl st 4 times connecting Row 112 to row 1, 4 sl st the rest of row 1, 2 sl st flo, turn (see photos above for reference)
Row 111: sk 2 sl st, 4 sc, ch 2, turn
Row 110: 4 sc, 2 sl st flo, turn
Row 109: Row 1
Row 108: Row 2
Row 107: 4 sc, 1 st st flo, turn
Row 106-92: fold so right facing (out sides of bag) are facing each other, make sure stitches are lined up with Row 1, sl st 4 times connecting Row 92 to row 1, 4 sl st the rest of row 1, 2 sl st flo, turn

To make strap:

Follow the instructions from this post. You can use as many chains as you want to create the length of the strap. I used 150 for a shorter strap.

Sew the ends of the strap to the sides of the bag close to the opening, and you’re done!